How this guide is organised
Start with Before you start if this is your first visit. If your account and workshop are already set up, use the Complete job workflow as the quickest route from a new booking to a paid invoice and proof pack. The remaining sections explain each workspace in more depth.
About the screenshots: explore the HoodHero workspace, from setup to customer handover. Trial and financial screens match this edition’s currency. Other examples may show UK controls; your own country controls which lookup tools are available. Select any image to open it full size.
Access, sign-in and membership
Create or sign in to your HoodHero account, choose a plan and start the 7-day trial. The current web trial can start without a payment card; add payment details when you decide to continue.
What you need
- A HoodHero account with a Garage Pro Monthly or Annual membership, starting with a 7-day free trial.
- Access to the email, Google or Apple sign-in used for your HoodHero account.
- A modern desktop or tablet browser. Chrome, Edge, Safari and Firefox should be kept current.
- Internet access. Workshop records are cloud-backed; some local drafts remain in the current browser until saved.
Sign in for the first time
- Open the HoodHero web app from your country’s website.
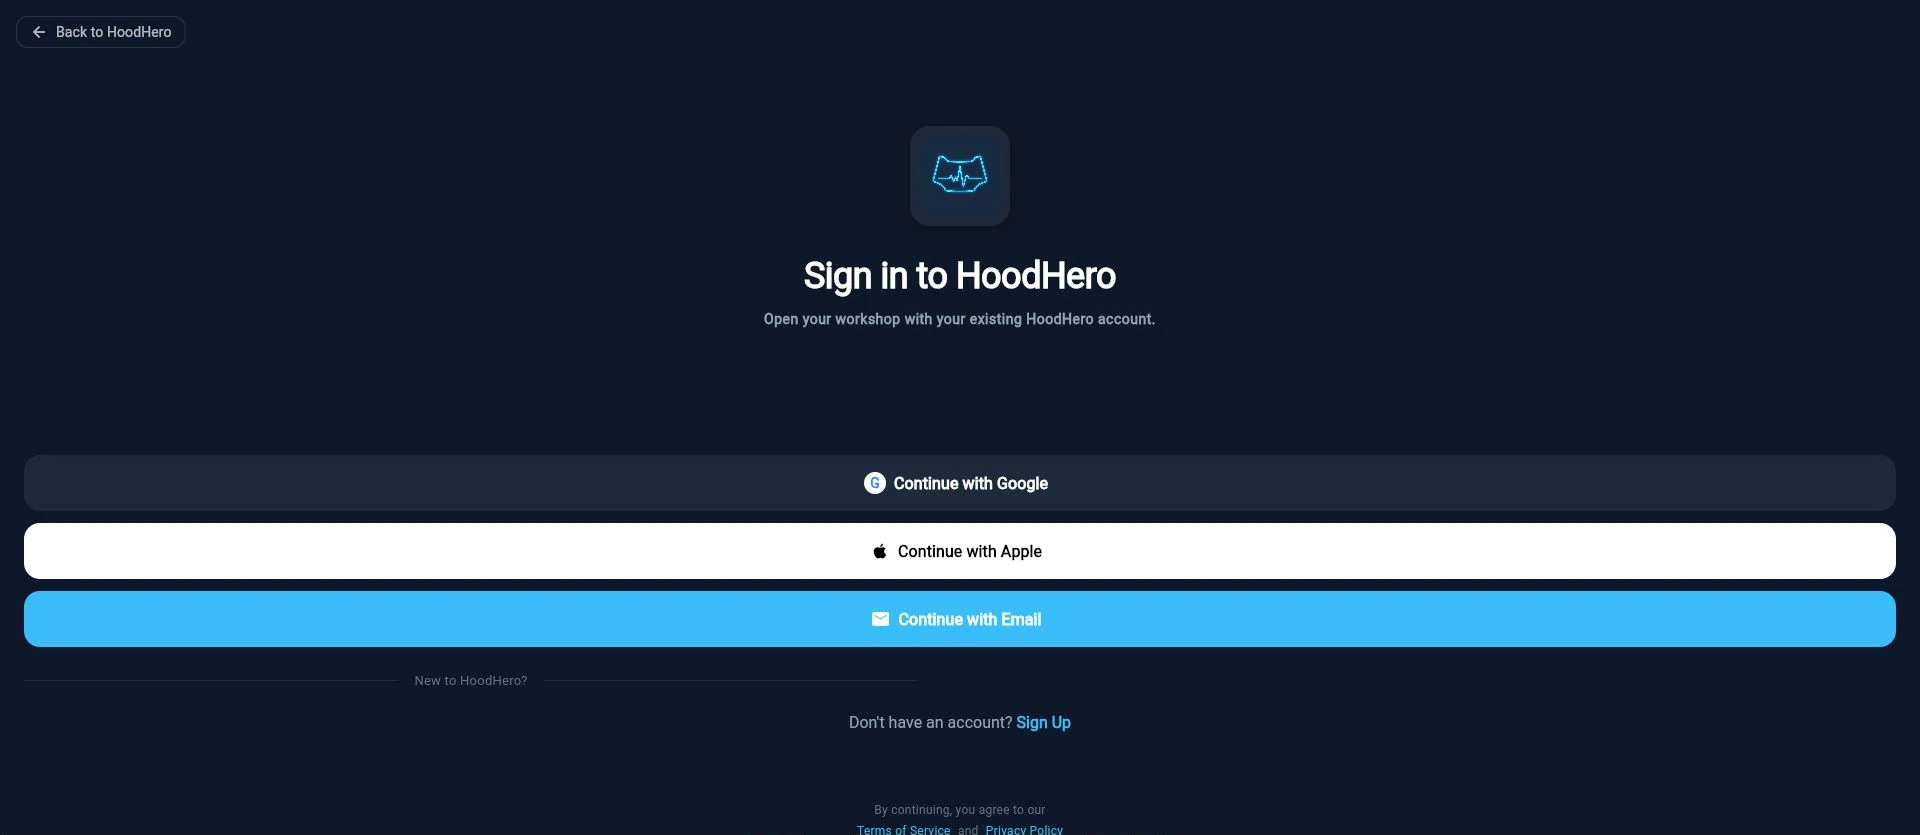
- Sign in or choose the email Sign Up option to create your HoodHero account.
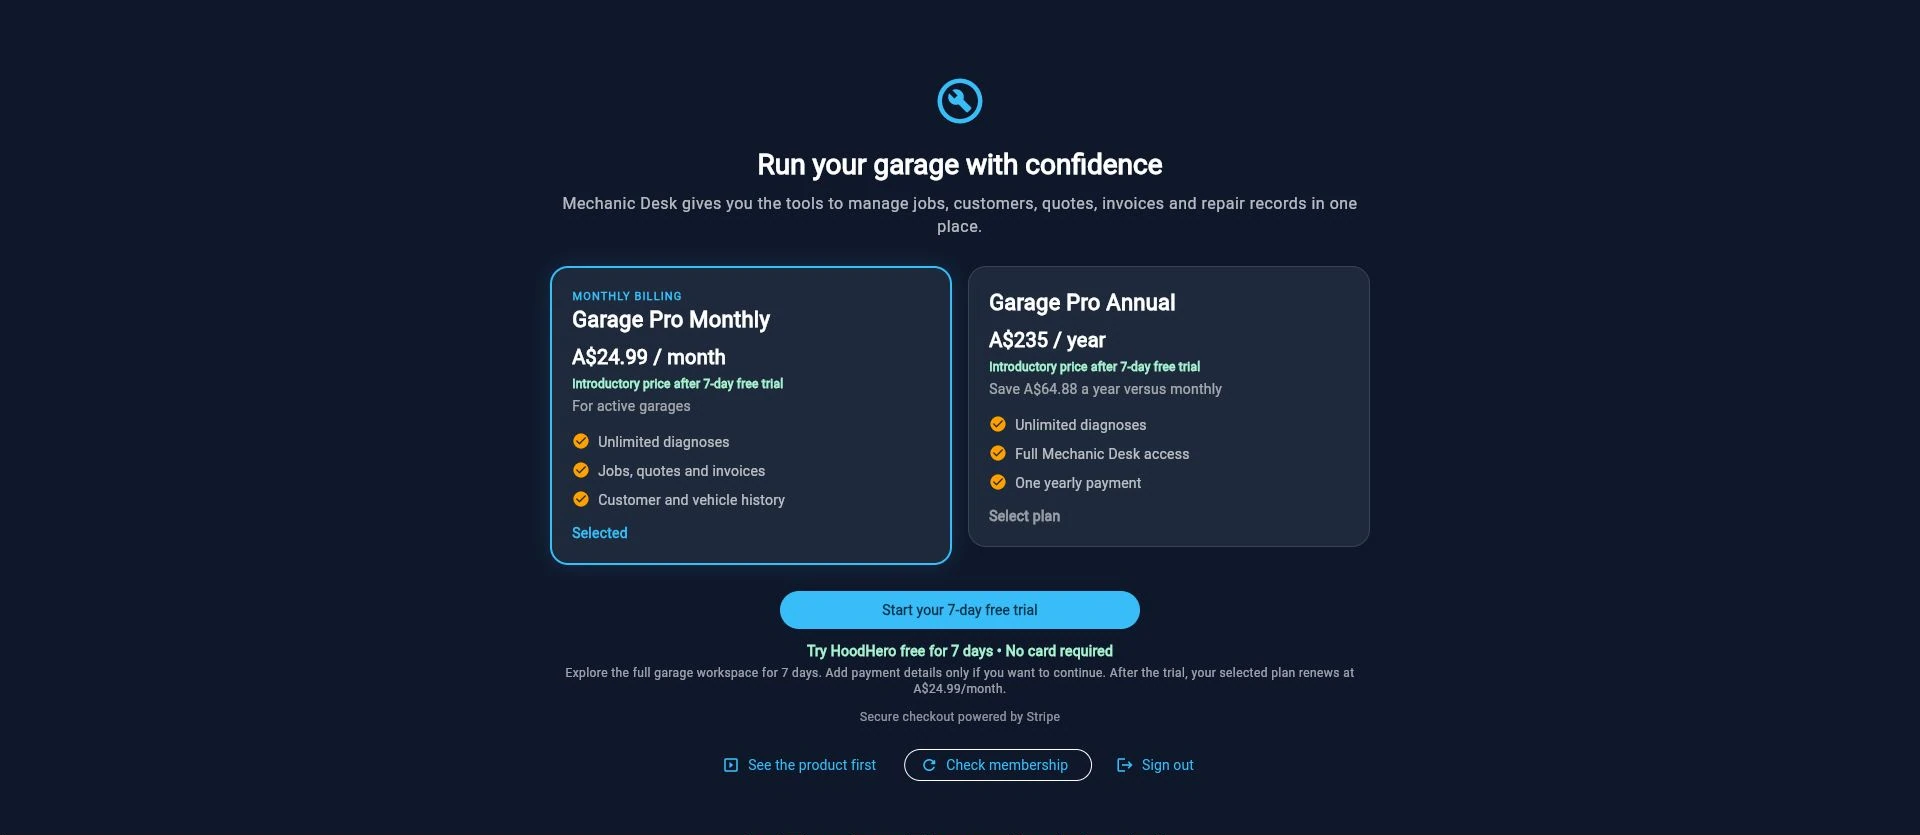
- Choose Garage Pro Monthly or Annual and select Start your 7-day free trial. Follow the return screen to open your workshop.
- Return to the browser and choose Check membership if the workspace does not open automatically.
- Verify your email if asked. When membership is confirmed, the Mechanic Desk opens on the Dashboard. You can use the ordinary workshop without setting up an authenticator.
Google or Apple may open a separate browser tab instead of a small pop-up. Finish sign-in there and return to the original HoodHero tab. Do not keep starting new sign-in attempts while one is open. Your existing HoodHero account keeps its records; creating another account does not move them.
The trial banner shows the end date and an Add payment method action. Use that to continue after the trial. If the app shows a payment problem, use Manage billing and complete the Stripe billing page. Review any plan change or cancellation before confirming it; contact support if billing controls are not available for your account.
Important truth-in-workflow rules
HoodHero distinguishes a prepared action from a completed external action. For example, copying a message does not prove it was delivered, and a manual payment record does not mean a payment provider processed a charge. Check the status shown on the record before relying on it.
Use your computer’s screen lock, with an authenticator as an alternative
Normal sign-in and email verification let you use the workshop. Extra verification protects accounting connections, accounting sync and customer payment-link actions. You do not need a new authenticator app just to try HoodHero.
Set up Windows Hello on a Windows PC
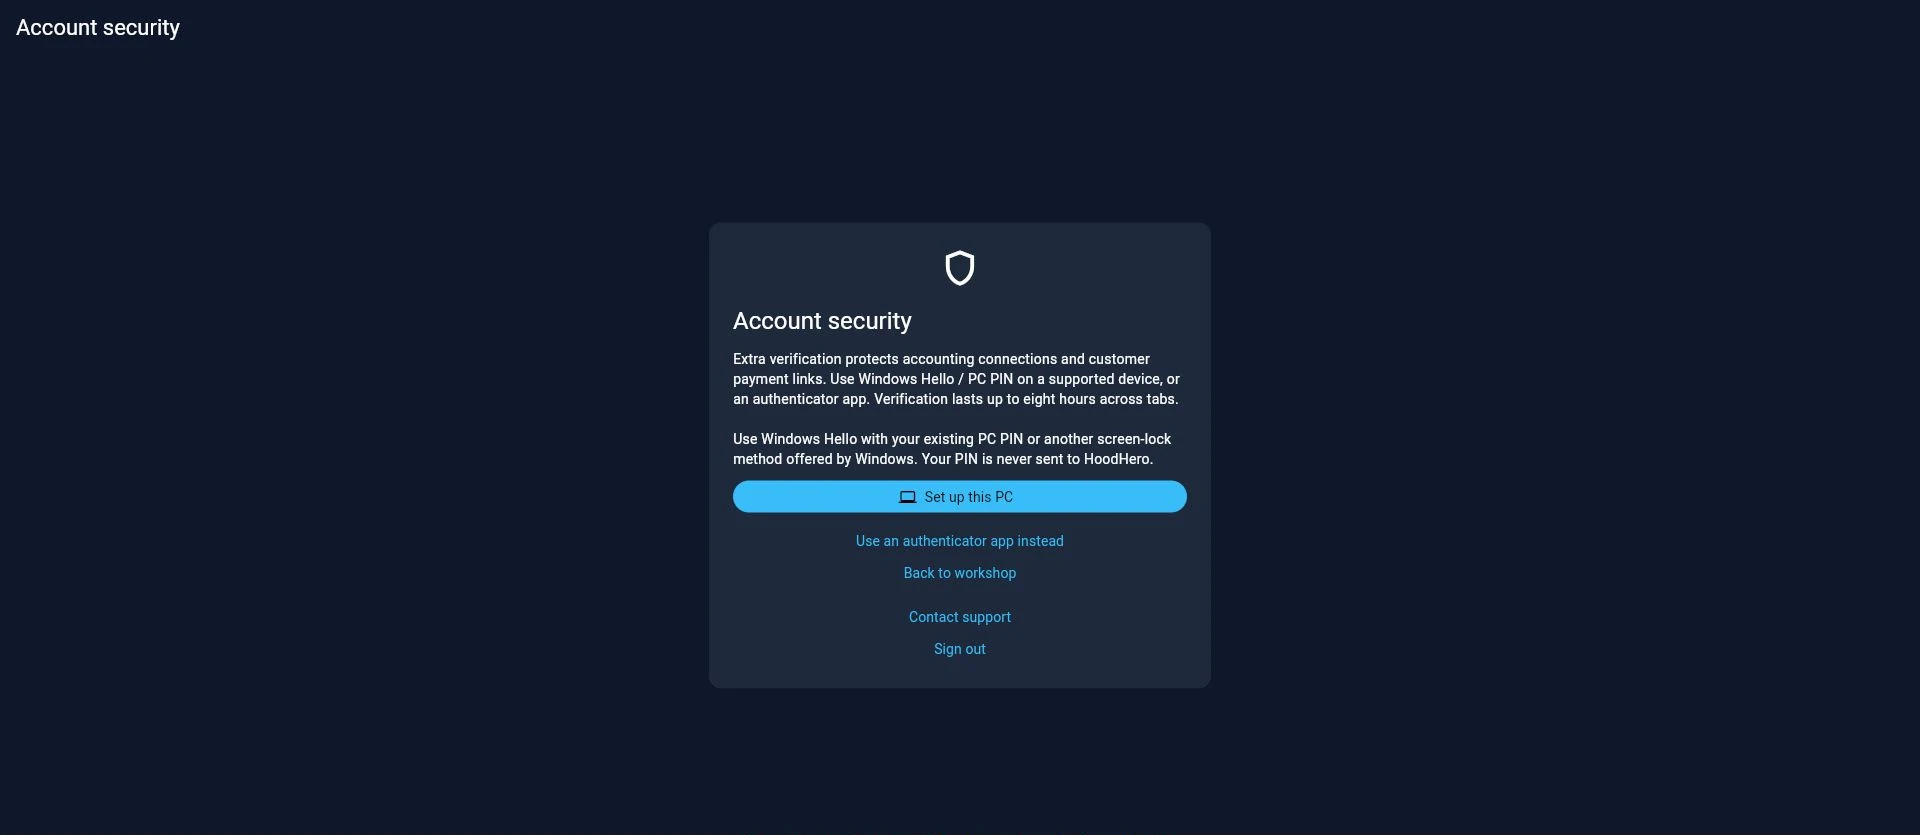
- Open Help & support → Account security. The app also offers verification when you start a protected action.
- On a supported computer, choose Set up this PC. HoodHero creates a passkey protected by the computer’s screen lock.
- Complete the browser or Windows Hello prompt privately with your existing PC PIN or other screen-lock method offered by your operating system. HoodHero never asks you to type your PC PIN into a web form.
- If you already have an authenticator or another passkey, verify with that existing method first when asked. Adding a new method requires a recent verification.
- Successful setup returns you to the workshop with a confirmation. Next time a protected action needs verification, choose Verify with Windows Hello / PC PIN and complete the Windows prompt.
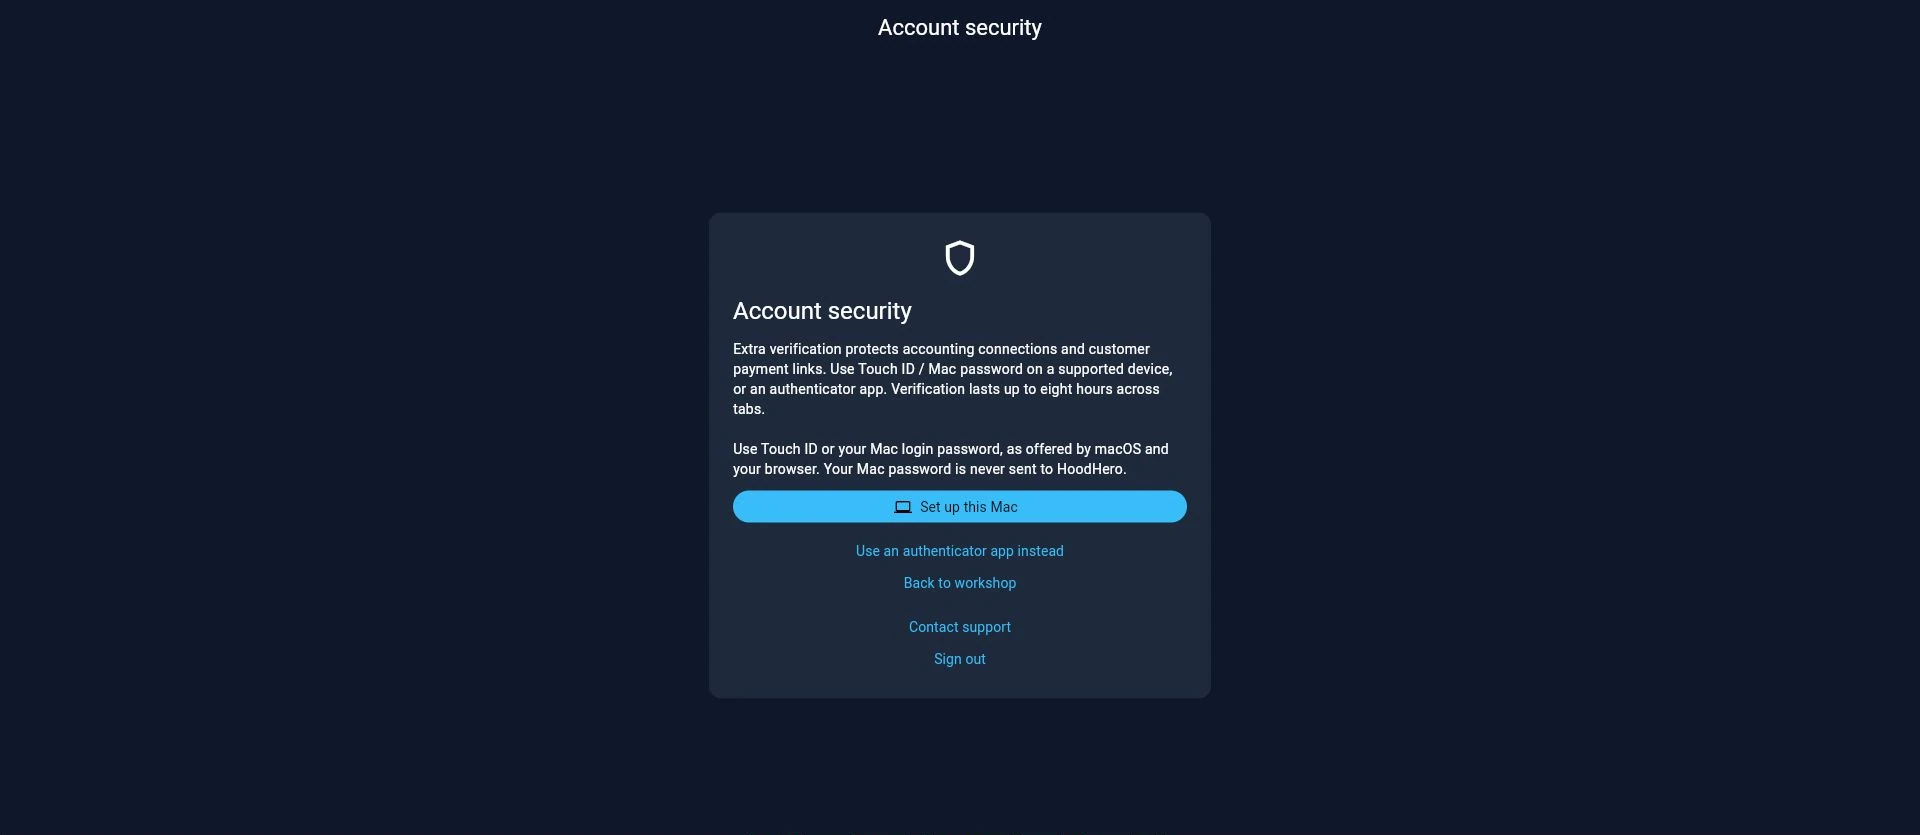
Set up Touch ID or Mac password verification on a Mac
- Open Help & support → Account security in a supported browser on your Mac.
- Choose Set up this Mac. The app uses the same passkey standard as Windows; macOS and your browser choose the available verification method.
- Complete the native prompt with Touch ID or your Mac login password, as offered. Touch ID hardware is not always required. Follow any browser or Apple Passwords/iCloud Keychain setup prompts before continuing.
- If you already have a verification method, use it when asked before adding the Mac. First-time setup may ask you to sign out and sign in again for a recent sign-in.
- Successful setup returns you to the workshop. When a protected action later asks, choose Verify with Touch ID / Mac password and complete the Mac’s prompt.
For platform setup details, see Apple’s Mac passkey guide and Chrome’s macOS passkey guidance.
Set up an authenticator instead, or add it as a backup
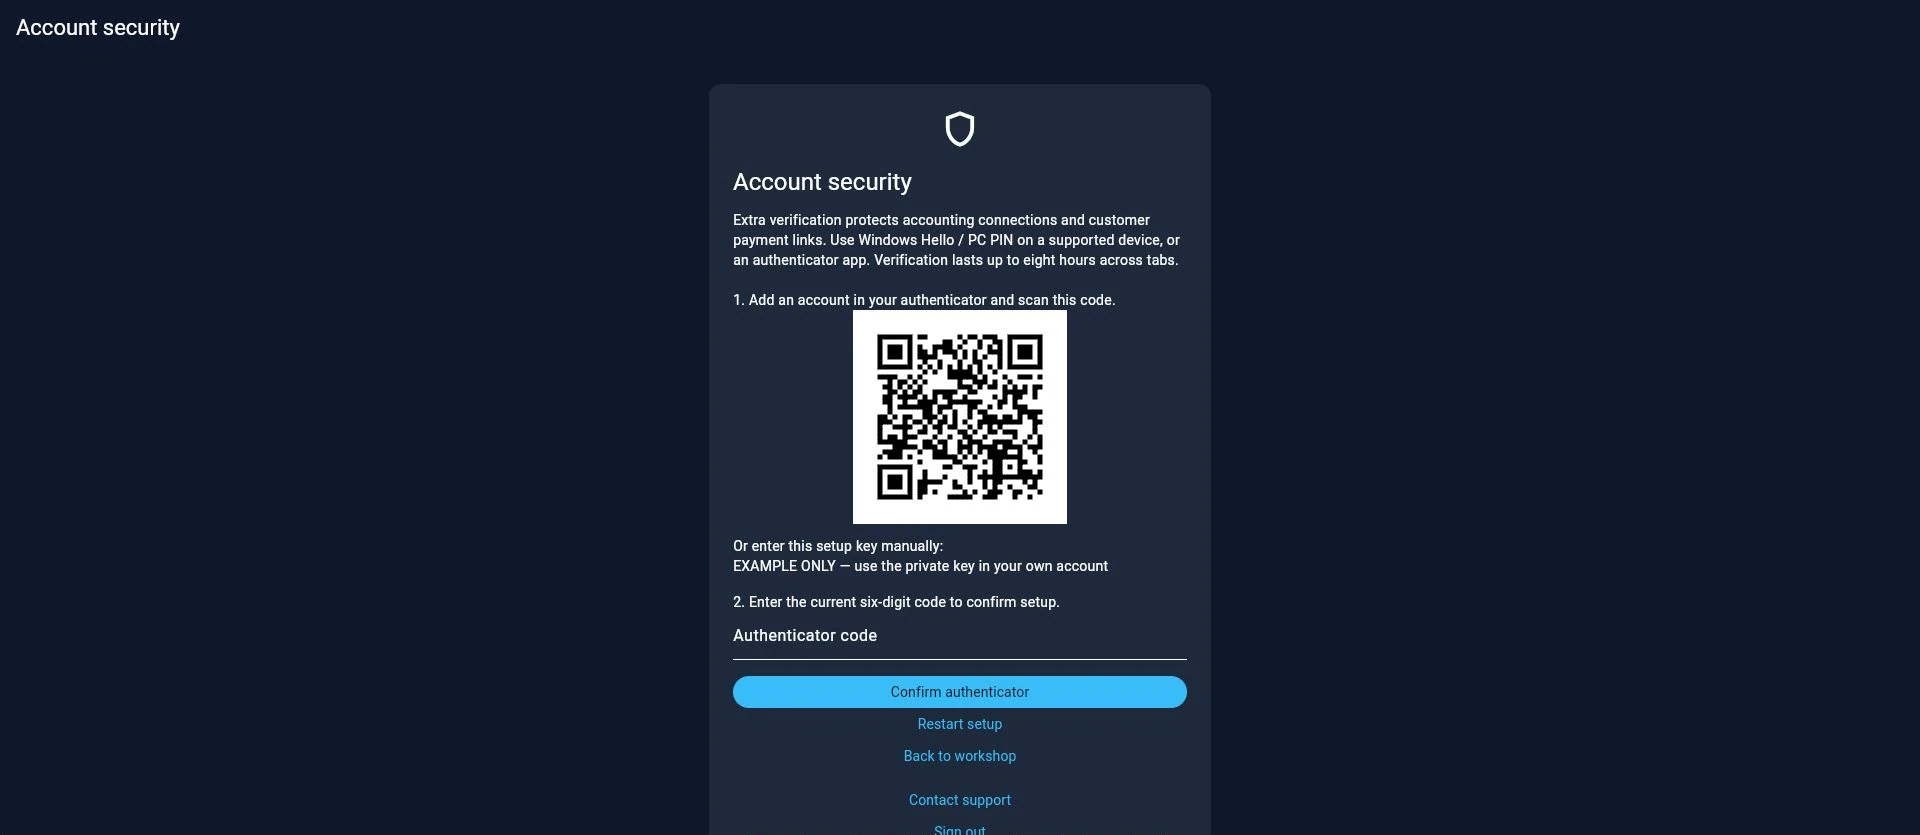
- In Account security, choose Use an authenticator app instead, then Set up authenticator. Unsupported devices show the authenticator option directly.
- In your chosen authenticator, add a new account and scan the QR code displayed privately in your own HoodHero account. If scanning is not possible, enter that account’s setup key manually.
- Enter the current six-digit authenticator code into HoodHero and choose Confirm authenticator. Setup is complete only after the code is accepted.
- For later verification, enter a current code and choose Verify web session. Keep a secure backup using your authenticator’s recovery options.
How long verification lasts, and what happens if you lose access
- Verification lasts up to eight hours across tabs of the same app in the same browser profile. Opening another tab does not restart the eight-hour period.
- Signing out, changing the sign-in session, changing security methods, expiry or clearing browser storage can require verification again. Separate browsers and old/new app domains do not share verification.
- Adding another security method may require fresh verification even when ordinary protected actions are still unlocked.
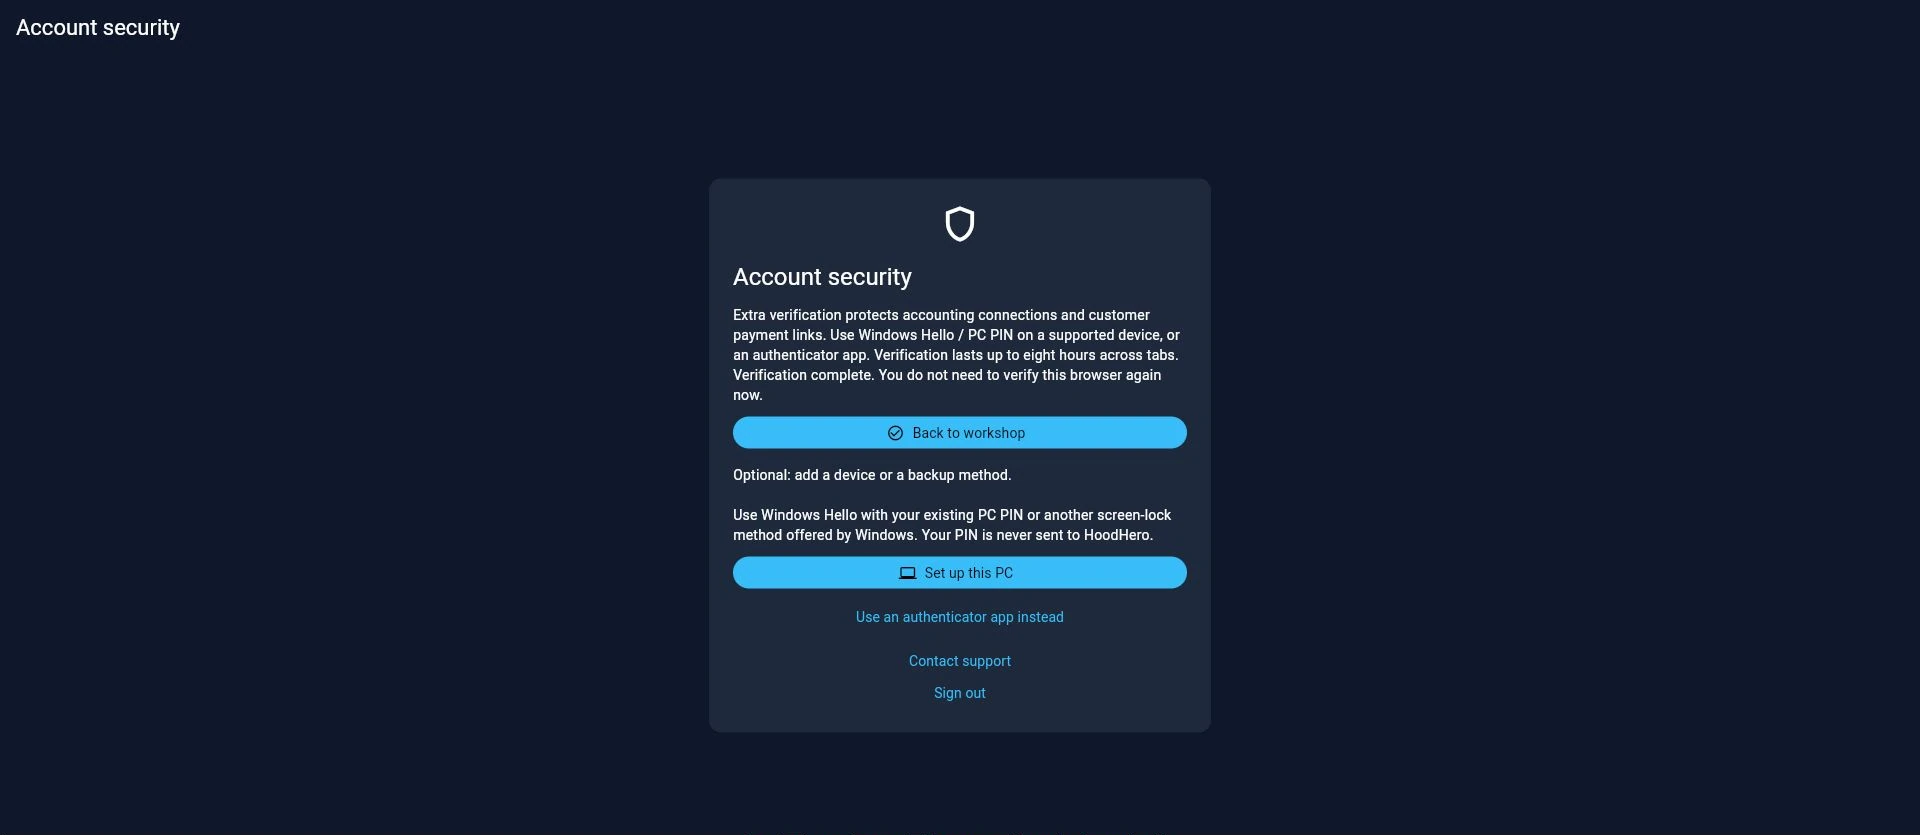
- If Account security says Verification complete, use Back to workshop; you do not need to verify again at that point.
- If a device prompt is cancelled, retry or use your authenticator. If all methods are lost, ordinary workshop sign-in remains available; contact support to recover protected actions.
- Email verification confirms your email address; email codes are not currently offered as the extra verification method. This security flow applies to the web app and does not add a new MFA requirement to the mobile app.
Choose the workshop’s country before entering money
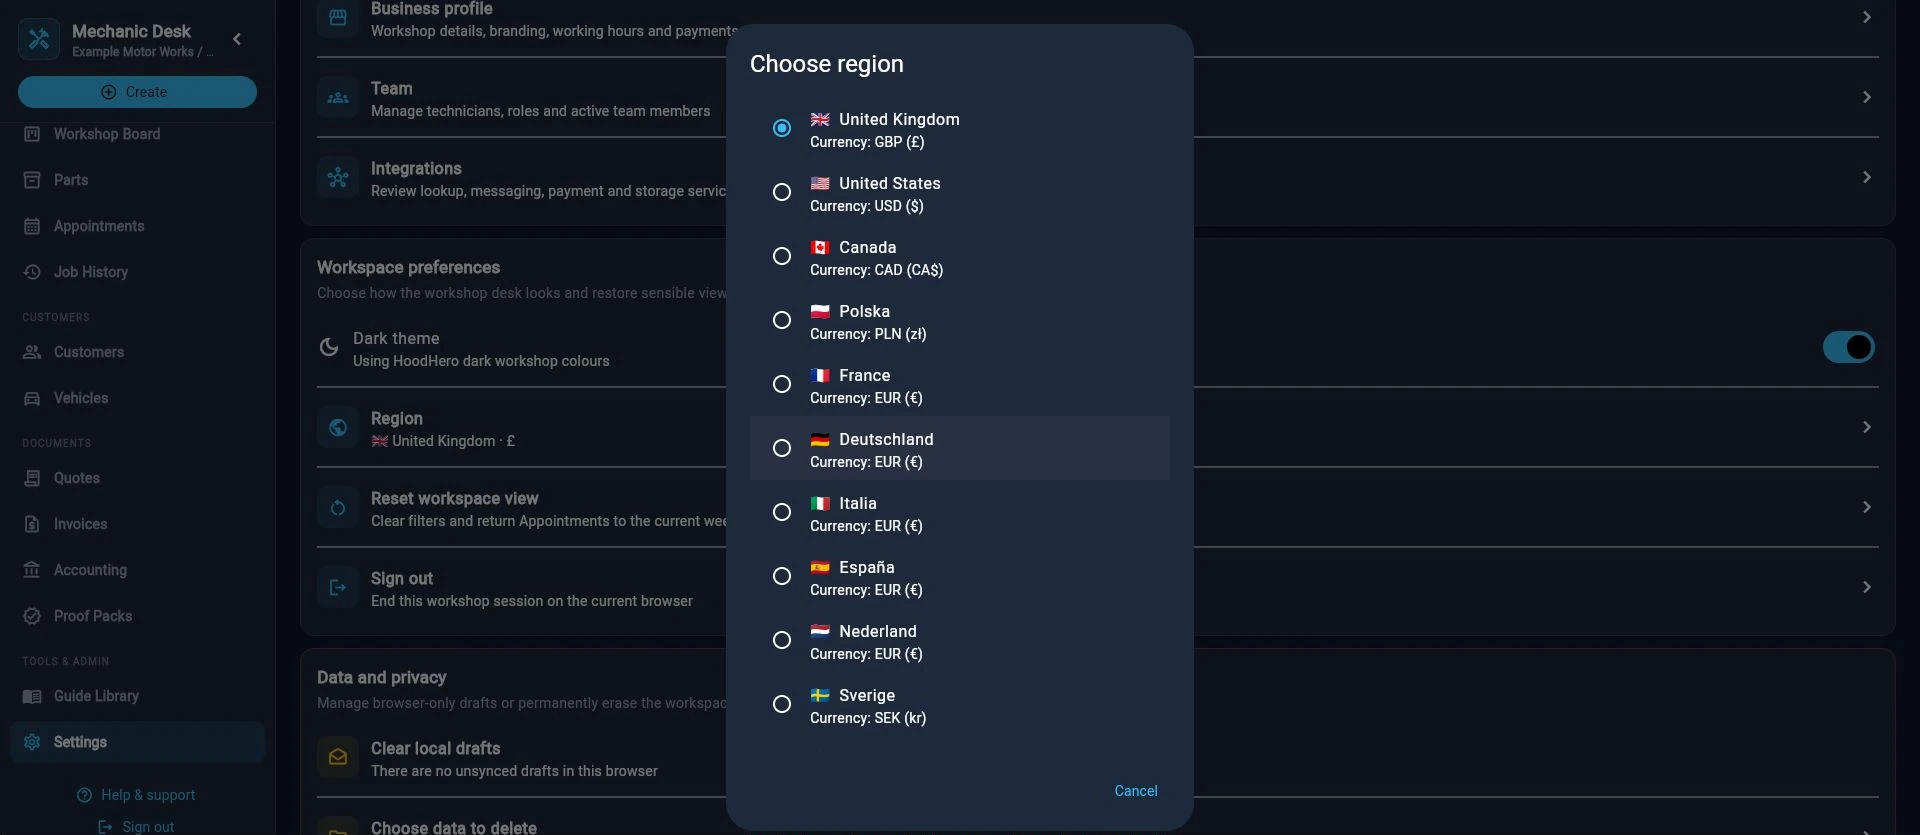
The website’s country selector chooses the local edition and subscription currency. In the signed-in app, Settings → Region controls the workshop’s regional tools and defaults. An existing account keeps its saved region.
- United Kingdom · GBP
- UK registration and DVSA MOT history/advisories where available, plus supported VIN lookup.
- United States · USD
- VIN-based vehicle identification. HoodHero does not provide a US state-inspection history lookup.
- Australia · AUD
- Metric units and VIN lookup through NHTSA first, then Auto.dev. Australian-market coverage varies; manual entry is available. Registration, roadworthy and inspection-history lookups are not provided.
- Canada · CAD
- VIN-based vehicle identification. HoodHero does not provide a Canadian provincial inspection-history lookup.
- Open Settings → Region and choose the country where the workshop operates.
- Review the currency shown in Business profile and on new quotes/invoices before entering amounts.
- Check both the currency code and symbol, especially USD versus CAD. Changing region is not an exchange-rate conversion of existing documents.
- Connect the accounting company with the matching home currency and review its tax mappings. Do not send a GBP invoice into a USD or CAD company.
Find your way around the Mechanic Desk
On a wide screen, the main workspaces appear in a left sidebar. On a narrow browser window, use the menu button to open the same navigation in a drawer.
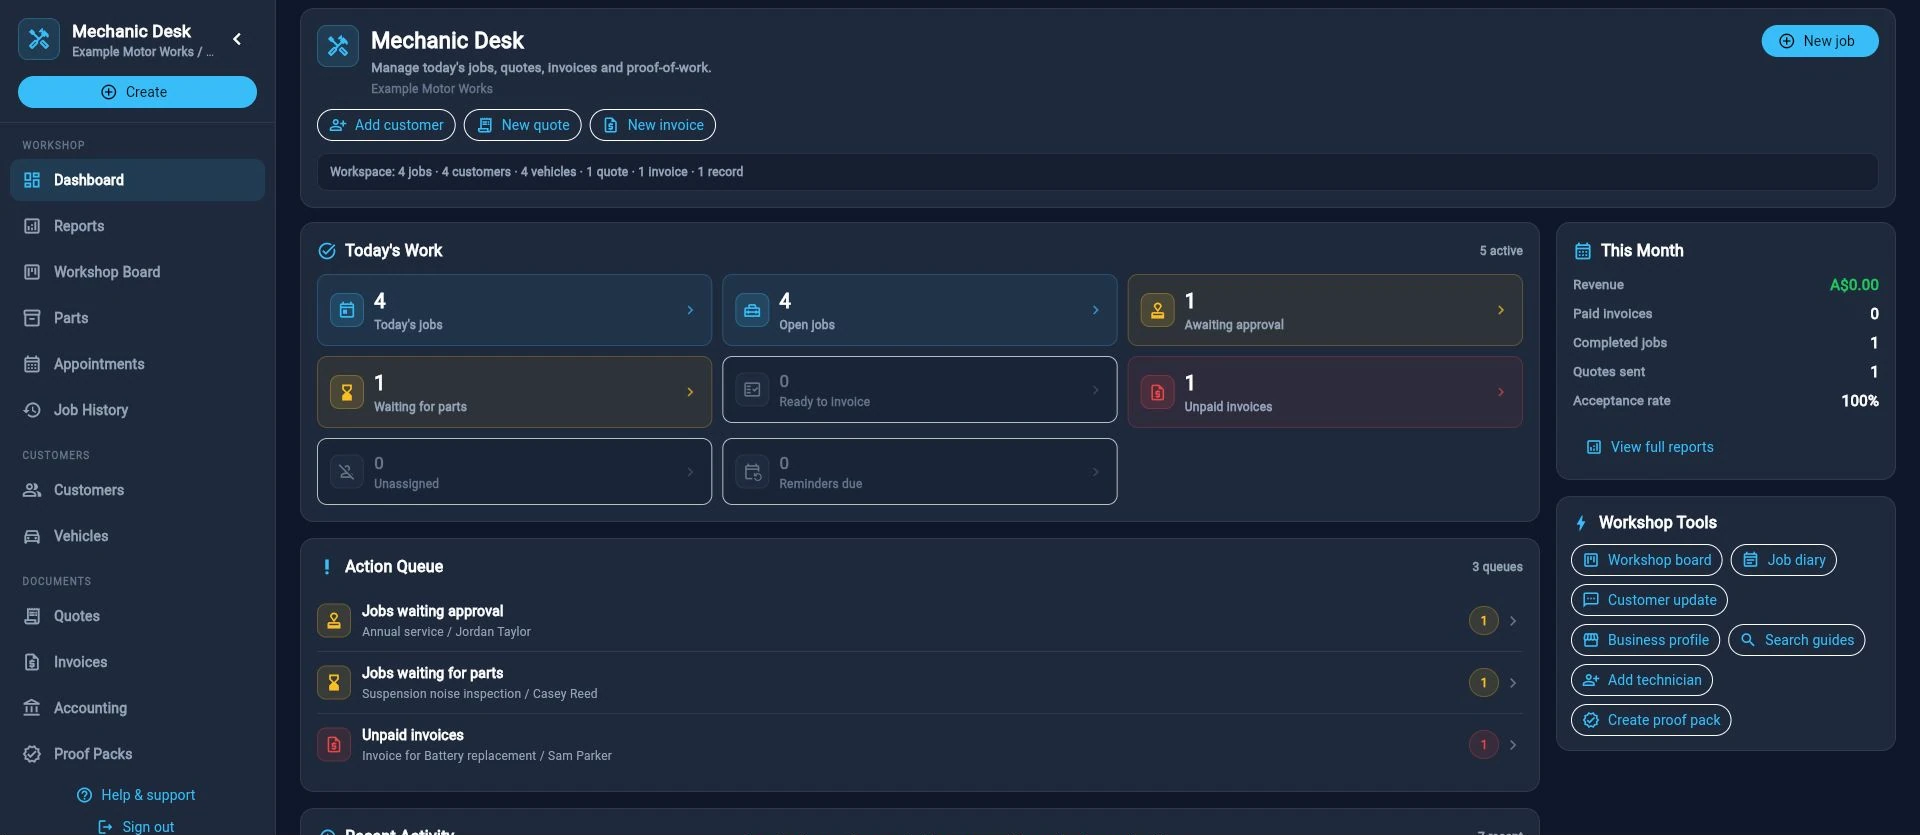
Dashboard
Your attention list, recent records, setup progress, quick actions and workshop report summary.
Reports
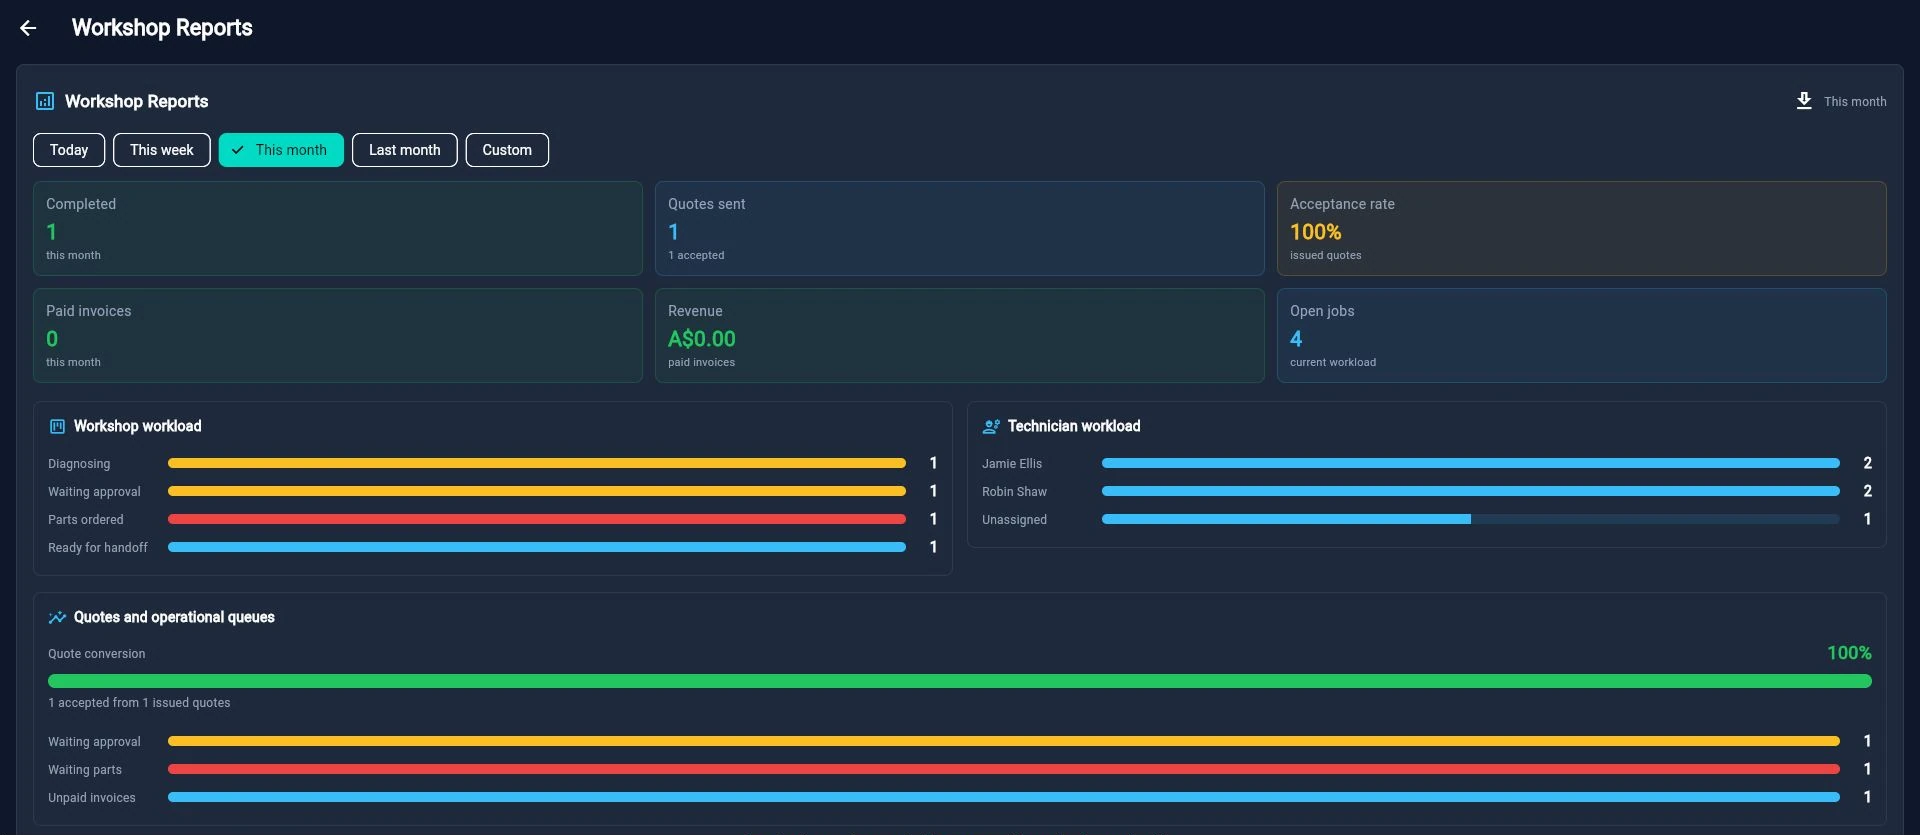
Choose the period and review workload, revenue, paid invoices and operational measures.
Workshop Board
Active jobs grouped by operational stage, with technician and attention filters.
Parts
Track required, ordered, delayed and in-stock parts across the workshop.
Appointments
Day, week, work-week, month and agenda booking views, plus blocked time.
Job History
Completed, cancelled, no-show and archived work with date, status and search filters.
Customers
Customer details, contact actions, vehicles, work, documents, reminders and communications.
Vehicles
Vehicle details, ownership, lookup context, MOT advisories and linked workshop history.
Quotes
Draft, send, accept, decline, duplicate, edit, archive and PDF-preview workflows.
Invoices
Invoice lifecycle, payment records, payment messages, PDF preview and CSV export.
Accounting
Date-range invoice exports and accounting integration status.
Proof Packs
Saved and ready-to-create customer handoff and internal job documents, with planned formats clearly labelled.
Guide Library
Searchable repair guidance and vehicle-aware guide generation.
Settings
Business profile, team, workshop tools, local drafts, workspace controls and sign-out.
The Create button and top actions
Use Create in the sidebar, or the plus action in the compact top bar, to start common records without first opening their workspace. The adjacent workshop-tools and business-profile actions provide fast access to configuration.
Prepare the workshop before the first live job
A few minutes of setup improves booking availability, branded documents, technician assignment and reporting.
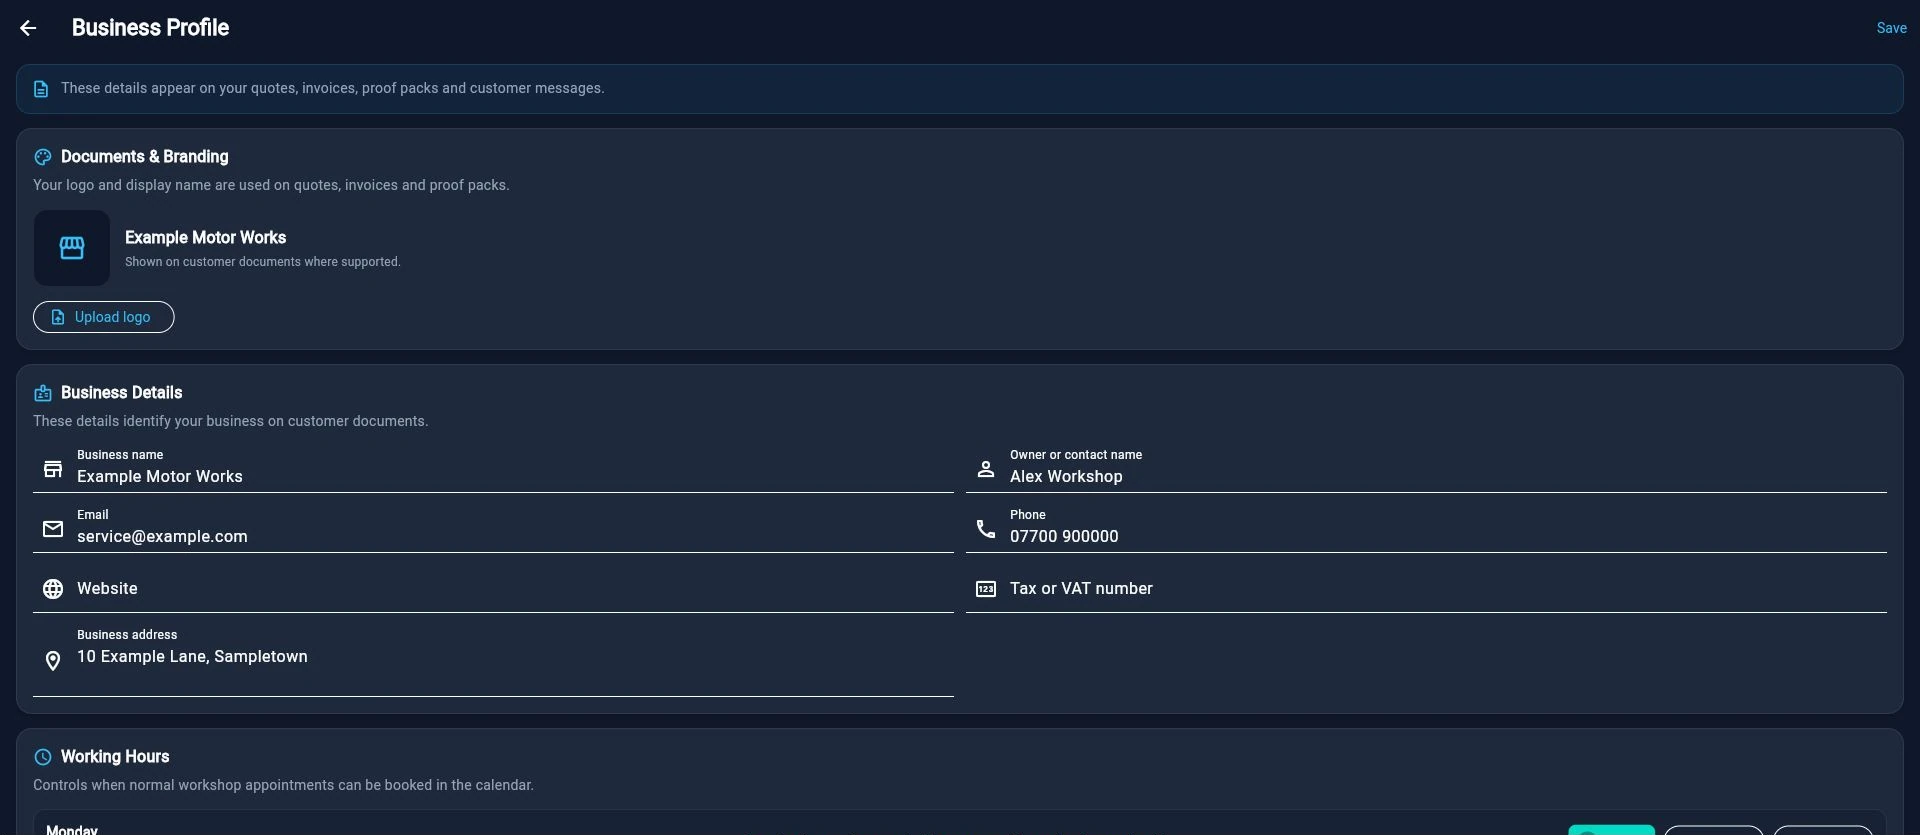
1. Complete the business profile
- Select the storefront/business-profile action in the header, or open Settings → Business profile.
- Enter the trading name, address, phone, email and any customer-facing business details.
- Add the logo that should appear on supported PDFs.
- Set the default currency, tax/VAT behaviour, invoice terms, payment instructions and document notes.
- Set normal workshop opening hours. Appointment capacity uses these hours when suggesting availability.
- Save, then preview a quote or invoice later to verify every public detail.
2. Add the team
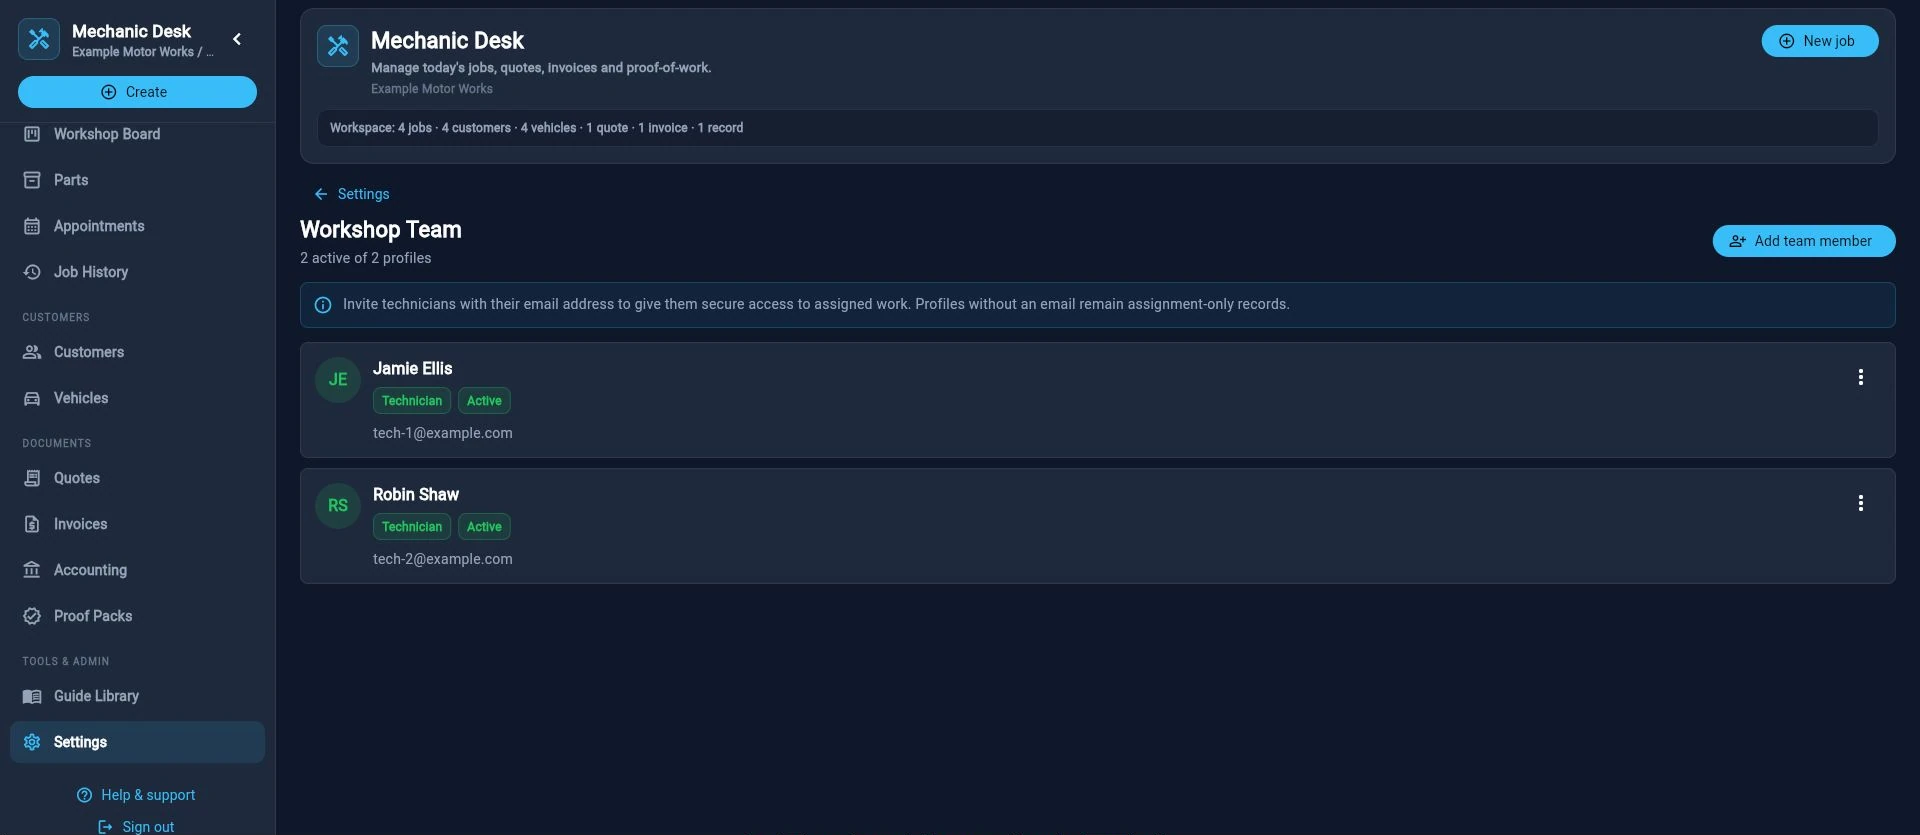
- Open Settings → Team.
- Select Add team member.
- Enter the name, role and any optional contact or capacity information.
- Keep active the people who should appear in technician filters and assignment controls.
- Add an email to invite a technician to their own sign-in; without an email the profile is assignment-only. Review invitation status and share an invitation only with the intended colleague.
- Choose the appropriate role. Technicians work with their assigned jobs and guidance; owner/manager functions include broader workshop and commercial controls. What each person sees depends on their role.
- Deactivate a person who should no longer take new work; existing historical assignments remain meaningful. Do not share the owner’s login or authenticator to give someone access.
3. Review workshop tools and integrations
Open the hub/workshop-tools action. Review vehicle lookup, communication, payment, accounting, parts and labour providers. A provider may be shown as available, configured, connected, manual-only, unsupported or unavailable.
4. Create reusable labour and repair templates
Use labour templates for repeat line items such as diagnostic time, MOT preparation or common servicing work. Templates speed up jobs and documents, but applying one creates editable working data—it should not silently change the original template.
In Business profile, review hourly rate, minimum labour charge, diagnostic/callout fees, working hours, labour item presets and job/message templates. A template is an editable starting point, not manufacturer repair-time data or proof that a message was sent.
Run one job from booking to payment
This is the recommended first real-world journey. It creates a useful customer and vehicle history while exercising the core Mechanic Desk workflow.
A. Add the customer
- Open Customers and select Add customer.
- Enter the name and the contact details the workshop genuinely needs.
- Add useful notes, but keep private/internal detail out of customer-facing fields.
- Save and leave the customer record open for the vehicle.
B. Add and verify the vehicle
- From the customer record, choose Lookup vehicle, or open Vehicles → Add vehicle.
- For a UK workshop, enter a supported UK registration or VIN. US, Canadian and Australian workshops use VIN lookup; manual entry remains available.
- Review returned make, model, year and engine before saving. DVSA MOT details are available only for supported UK vehicles.
- Correct any inaccurate or incomplete field. A lookup assists the record; it does not replace workshop verification.
- Confirm the customer is linked as the owner or contact for the vehicle.
C. Book the appointment
- Open Appointments and choose the view that best shows capacity.
- Select New appointment or the plus action inside an available time slot.
- Choose the customer and vehicle.
- Record the customer’s concern in their own words, plus appointment type, date, time and technician where known.
- Save and confirm the booking appears at the correct time with the intended status.
- When the work is accepted or the vehicle arrives, convert or carry the appointment into a job.
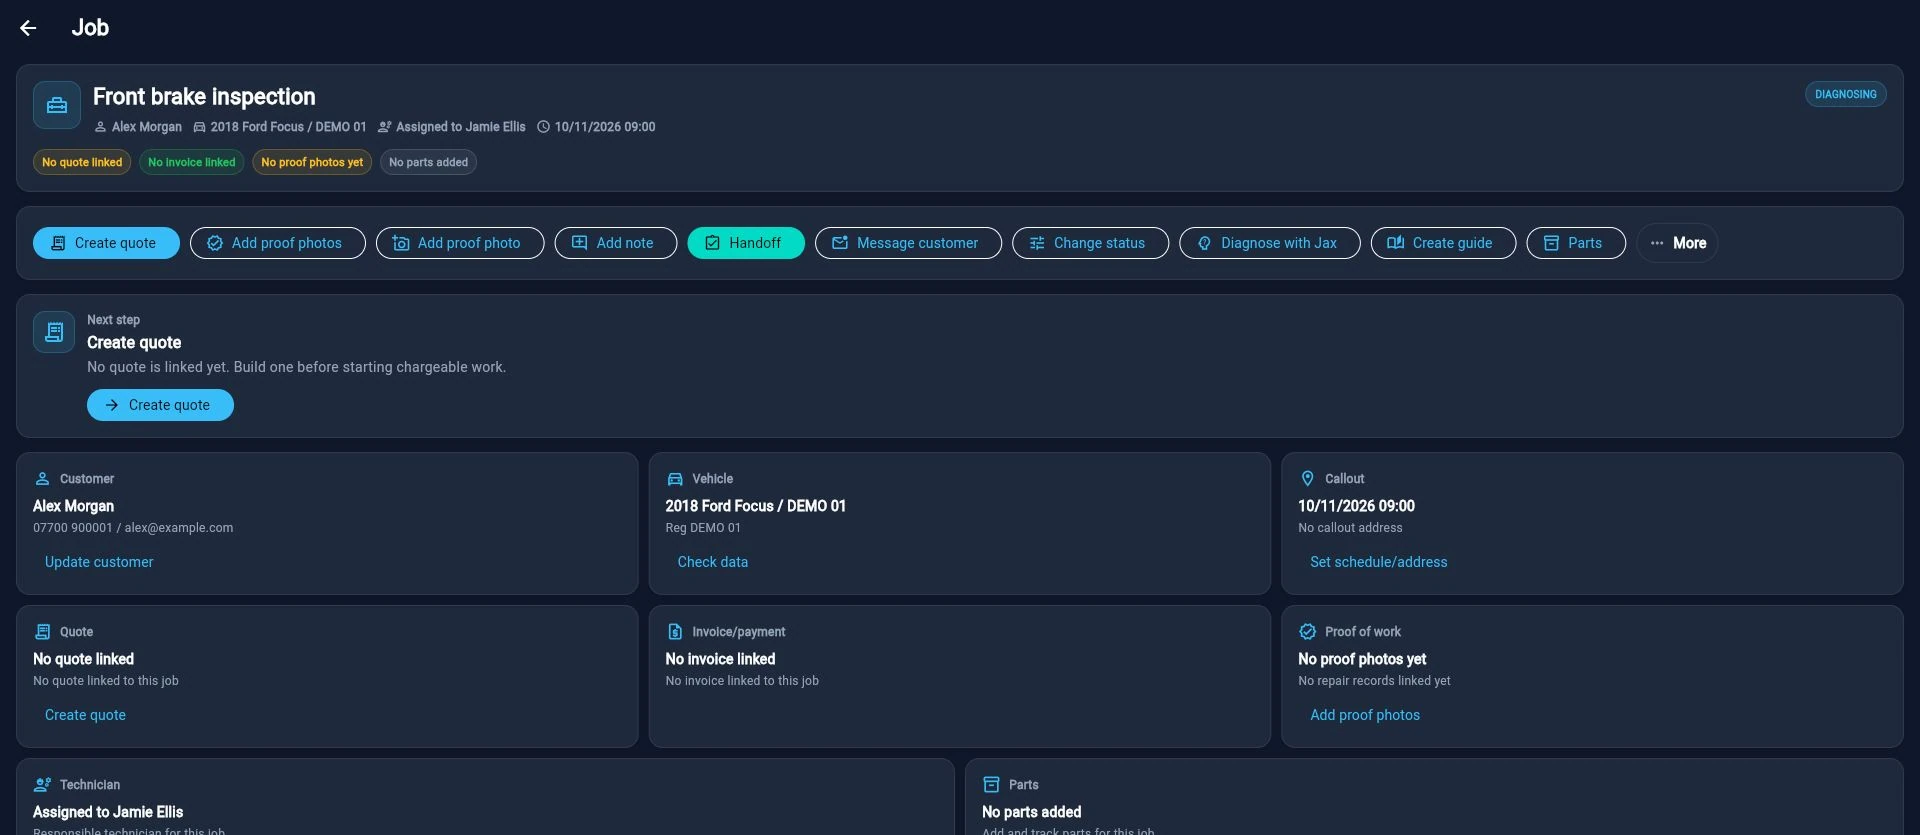
D. Control the job through the workshop
- Open the job from the appointment, Dashboard or Workshop Board.
- Assign the responsible technician and confirm the expected time.
- Move the status to the stage that describes the real situation—never to the stage you hope it has reached.
- Add findings, internal notes, checklist items, tracked parts and proof evidence as the work progresses.
- Use Jax or the Guide Library when useful, review the result and save only accurate, workshop-approved content.
- Use the activity timeline to confirm handoffs and important changes are recorded.
E. Quote and get approval
- Select Create quote from the job.
- Add labour, parts, fees, quantities, unit values, discount and VAT/tax as applicable.
- Check the customer, vehicle, expiry date, notes and totals.
- Preview the PDF and verify the business branding and page layout.
- Mark the quote sent only after completing the customer handoff.
- When the customer confirms, record Accepted or Declined truthfully. Use the customer message tools to prepare an editable record of communication.
F. Complete, prove, invoice and record payment
- Move the job through parts and in-progress stages, keeping notes and proof current.
- Complete quality control and move the job to QC / ready when it is genuinely ready for handover.
- Create the invoice from the accepted quote where possible, then verify line items and totals.
- Preview/download the invoice PDF and hand it to the customer through the chosen channel.
- Record payment method, reference, date and note only when payment has actually been confirmed.
- Create the appropriate proof-pack variant and preview it before sharing.
- Mark the job complete. Confirm it leaves active work and appears in Job History.
- If follow-up work is expected, create a service reminder or repeat job from the completed record.
Build a useful customer history
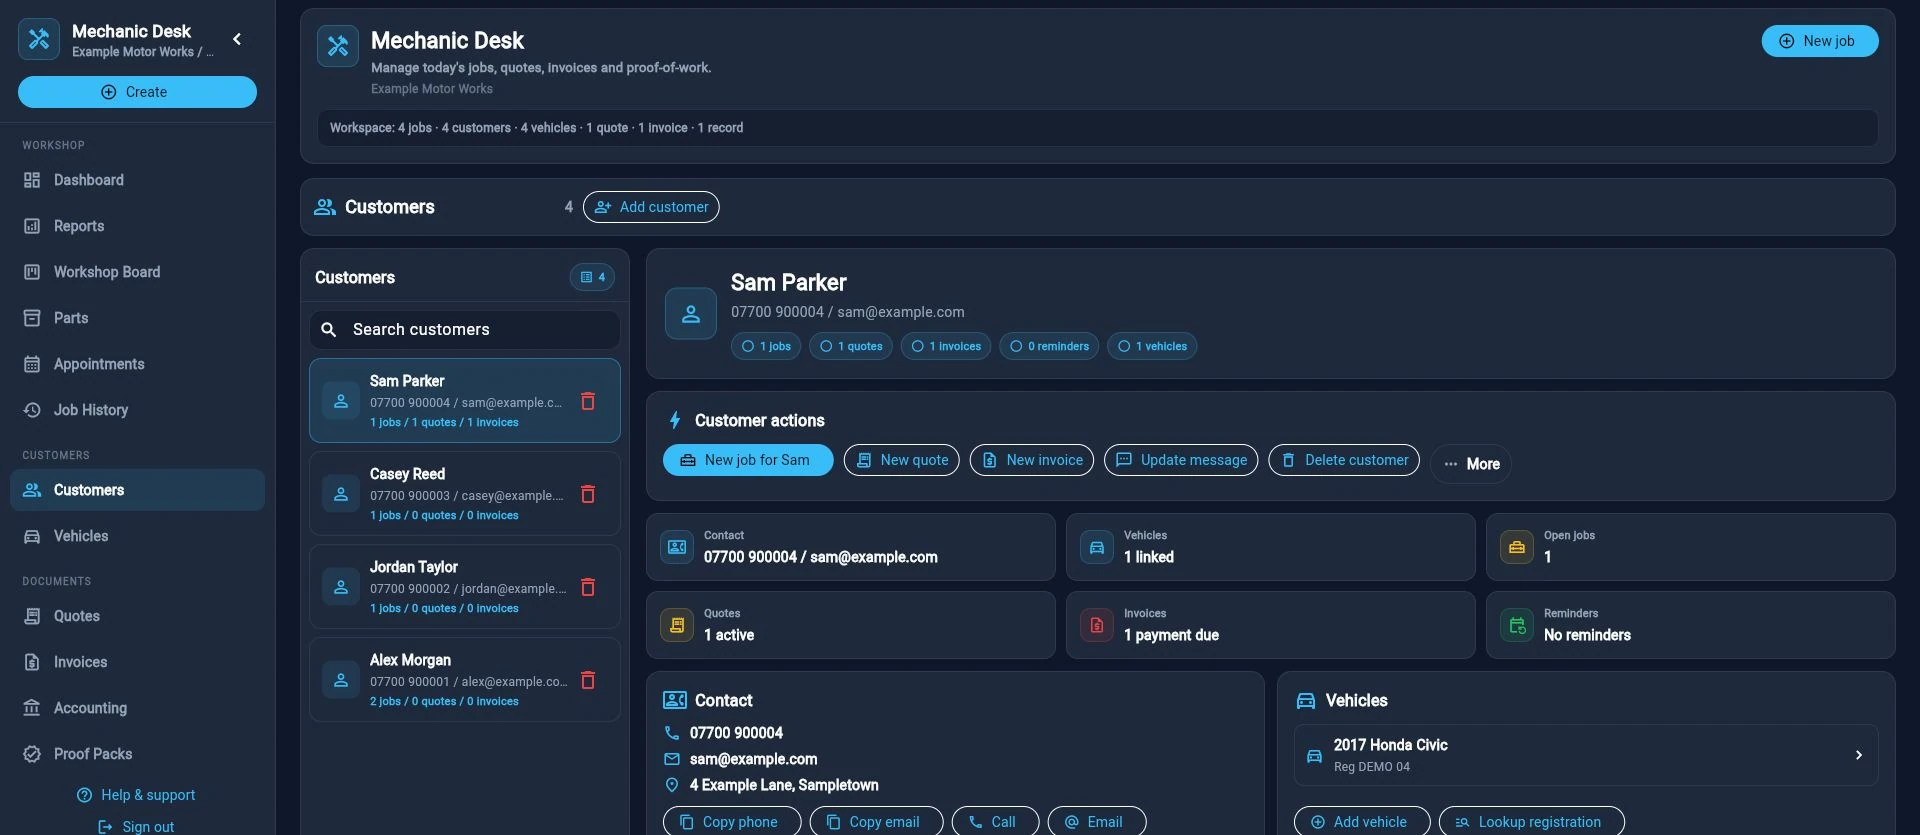
The customer record is the front-desk view of vehicles, work, documents, reminders and communication.
Everyday customer actions
- Search by customer name or saved contact detail, then select a result.
- Use Call and Email actions only after verifying the displayed destination.
- Create a new job, quote, invoice or reminder with customer context already carried across.
- Review linked vehicles, active and historical jobs, quotes, invoices and communications before answering a status question.
- Archive or delete only after reading the confirmation. Historical linked records may need to remain for an accurate business trail.
Customer messages and communication history
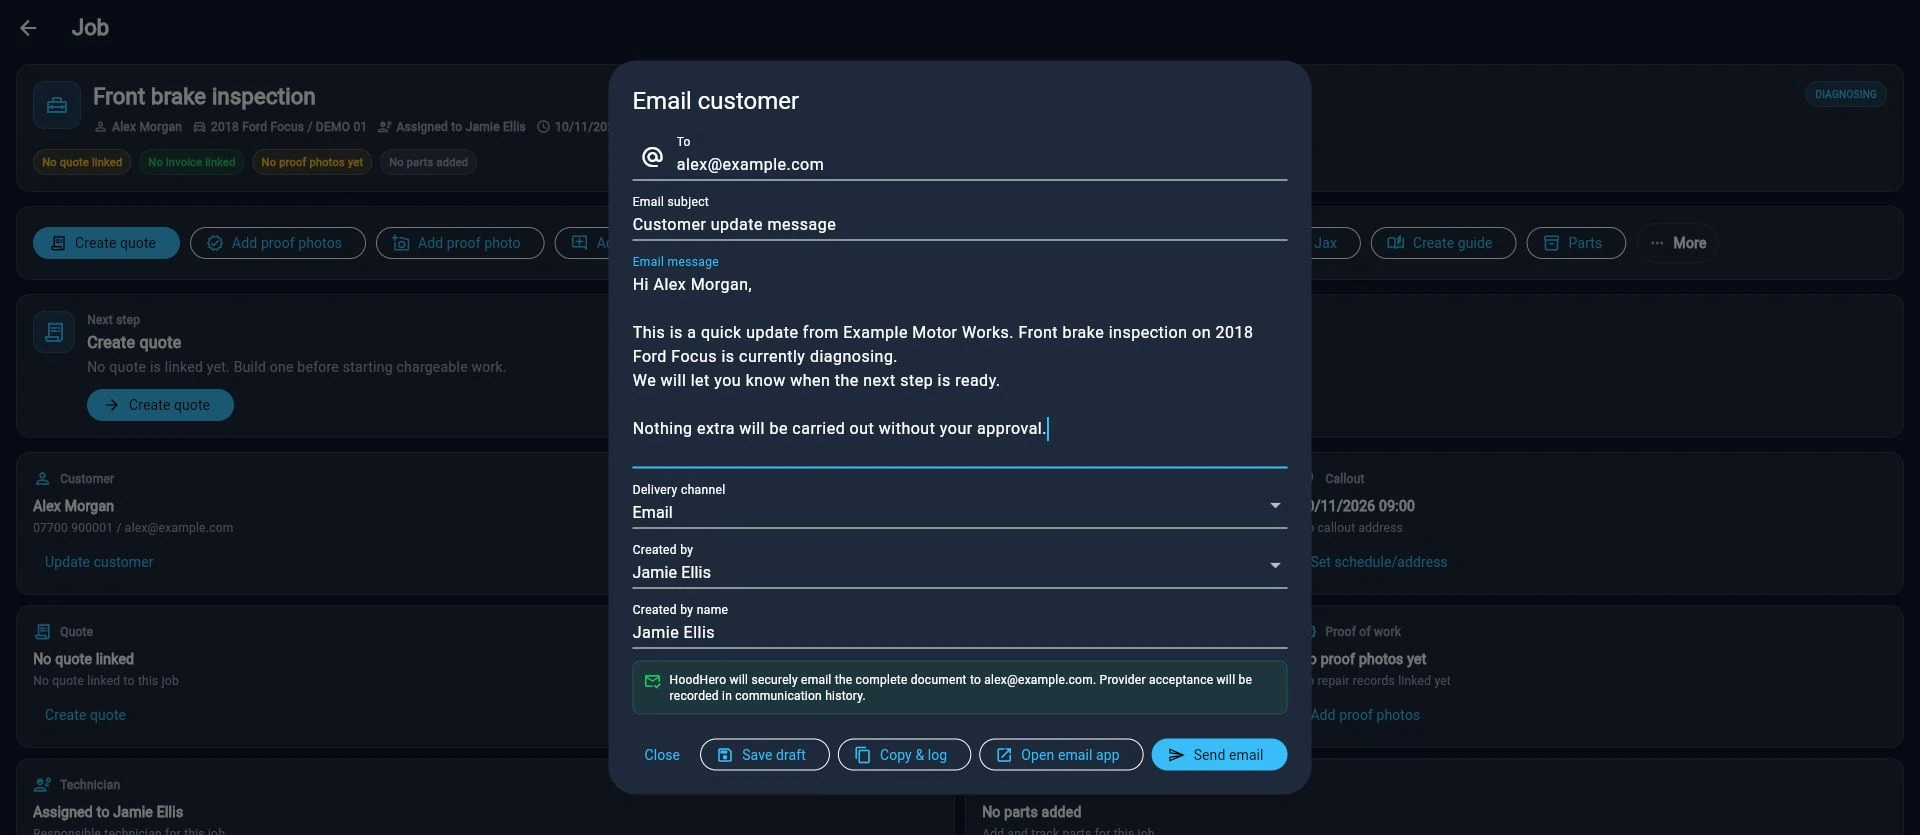
Message templates help prepare status, approval, payment and handover communication. Edit every draft and check the destination. Save draft keeps preparation separate from sending. Copy & log and Open email app hand the message to you to finish sending. Where Send email is available, HoodHero sends through its email provider and records provider acceptance; acceptance is not proof the customer opened it. For documents, review any PDF attachment before sending.
Keep vehicle intelligence attached to the right work
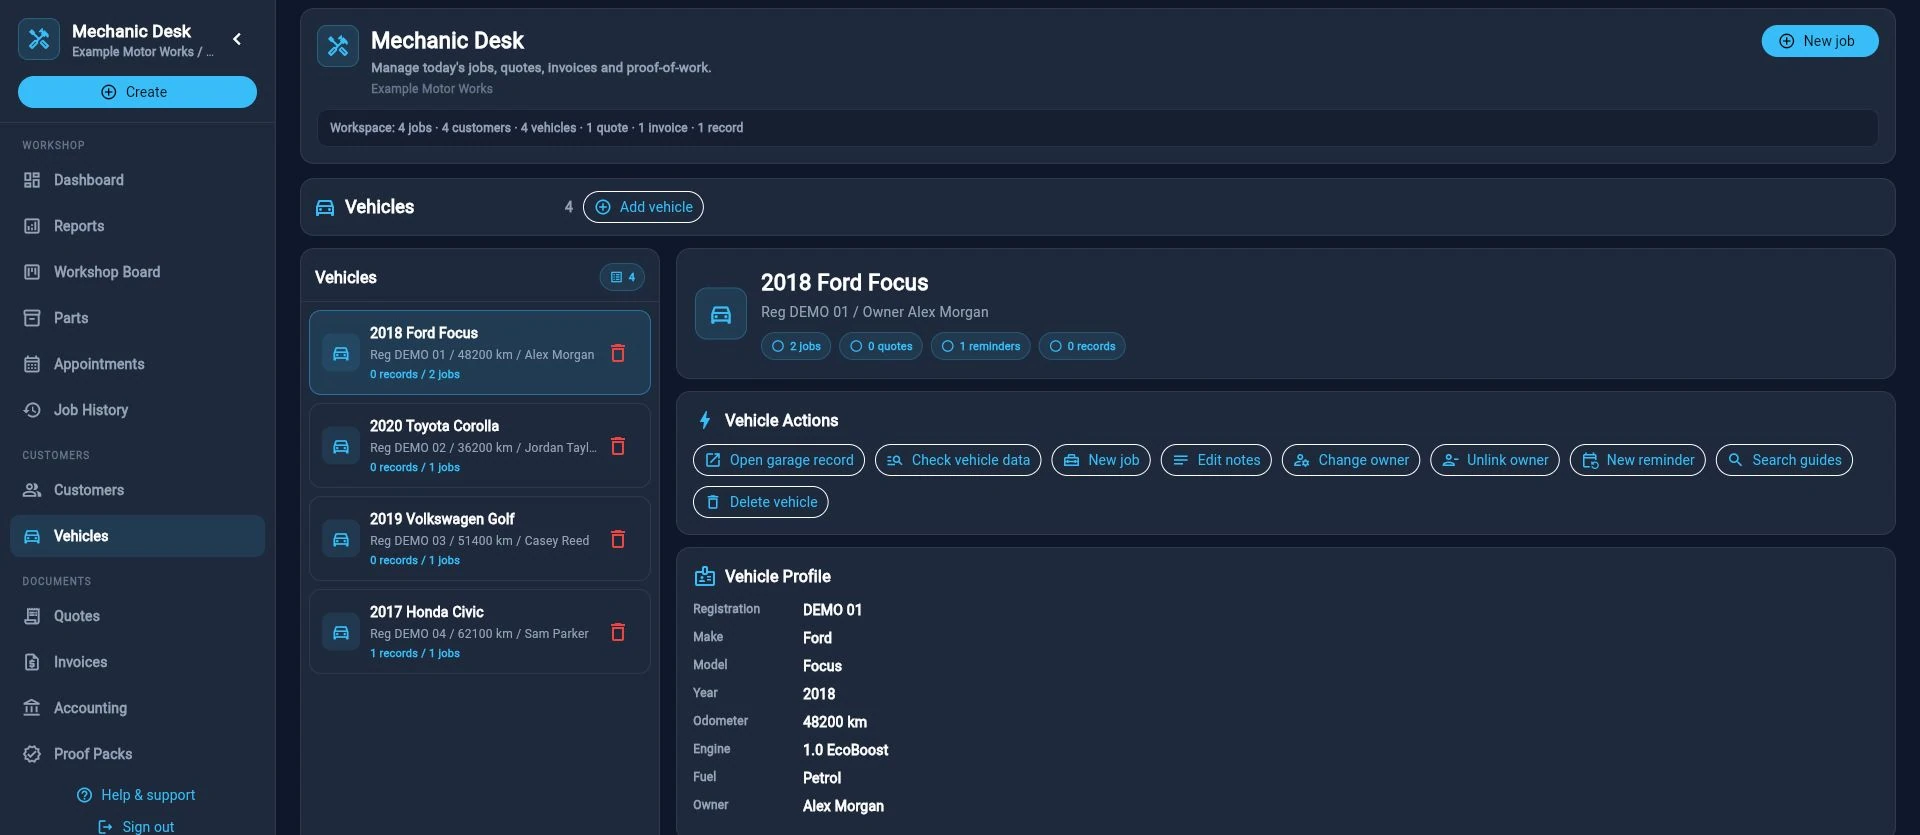
Vehicle records combine entered details, supported lookup data and workshop history. Always verify safety-critical specifications independently.
Registration and VIN lookup
- Open a vehicle or start Add vehicle.
- In the UK, enter a supported registration without extra punctuation or spacing, or use a valid 17-character VIN. In the US, Canada and Australia, use VIN lookup or enter vehicle details manually.
- Choose lookup/refresh and wait for the review screen.
- Compare the result with the physical vehicle and existing record.
- Save only after reviewing. If refresh fails, do not overwrite good existing data with blank fields.
UK-only MOT and advisory context
For supported UK vehicles with DVSA information, inspect test dates, mileage and advisories. An advisory can inform or be linked to a workshop job, but it is not automatically resolved merely because work happened. Mark resolution deliberately and preserve the evidence. These controls do not provide inspection-history lookup in the US, Canada or Australia.
Plan realistic workshop capacity
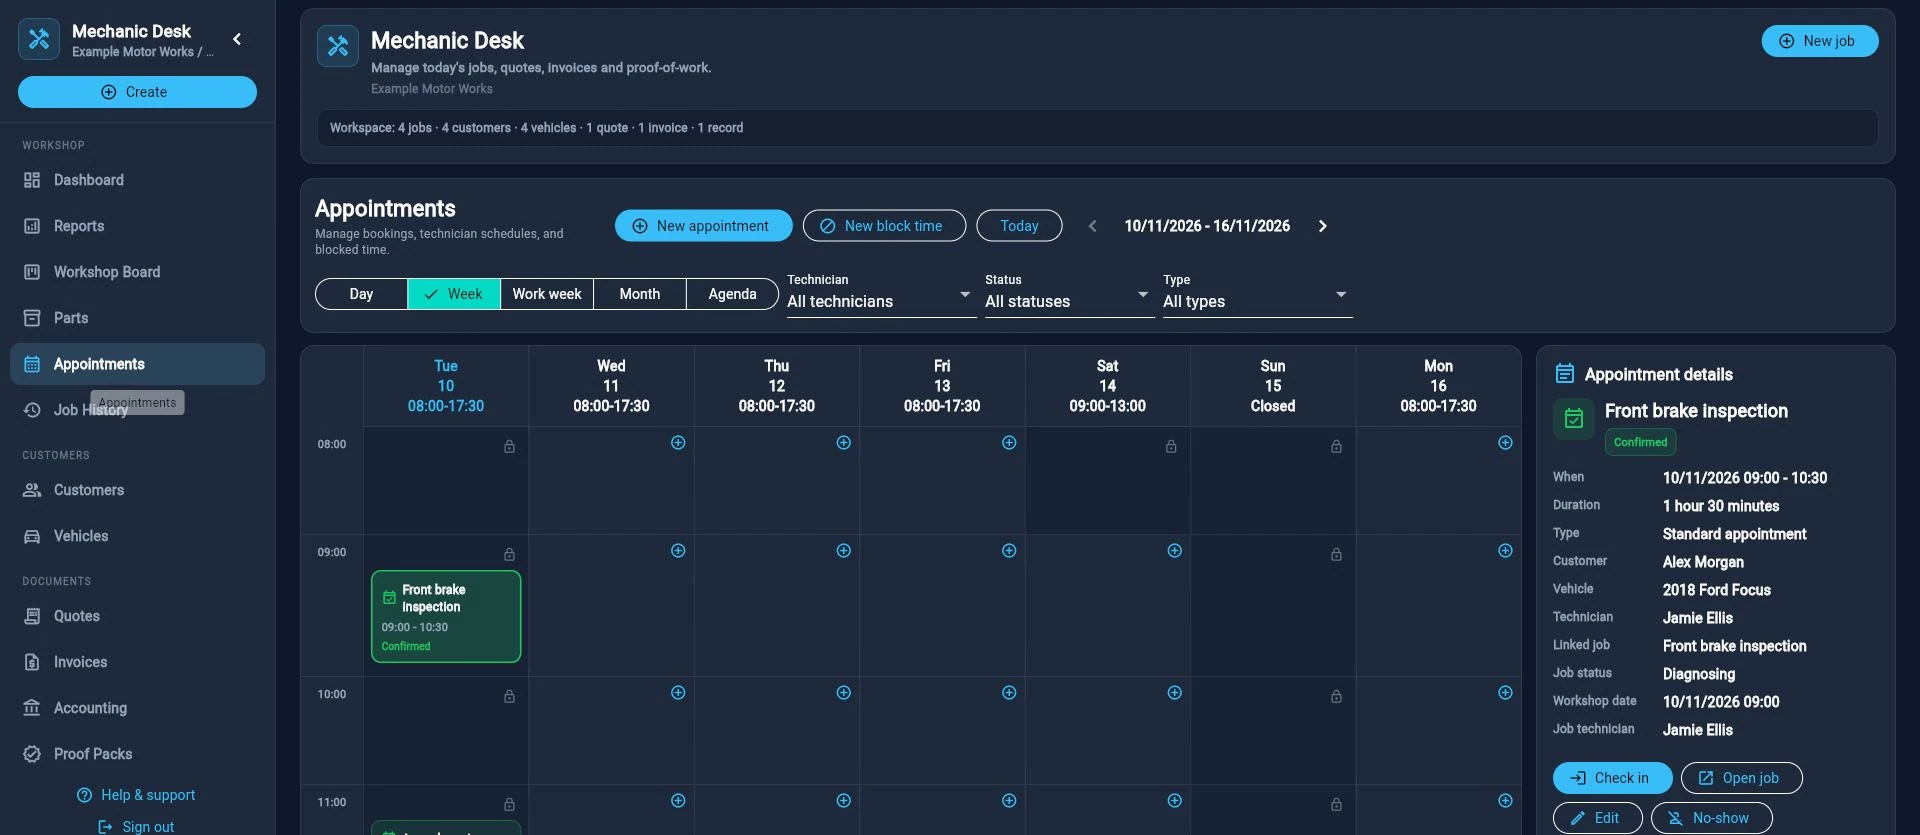
Appointments combine bookings, technician schedules and blocked time. Choose the calendar view that answers the question you have.
- Day
- Useful for precise timing and front-desk control today.
- Week
- A seven-day view of bookings and available workshop hours.
- Work week
- Focuses on configured working days and workshop availability.
- Month
- Useful for broad capacity and future booking patterns.
- Agenda
- A compact chronological list, useful on narrower screens.
Block unavailable time
Use block time for holidays, training, equipment downtime or any period that should not accept ordinary bookings. Give the block a clear label so another team member understands the constraint.
Make the real workshop state visible
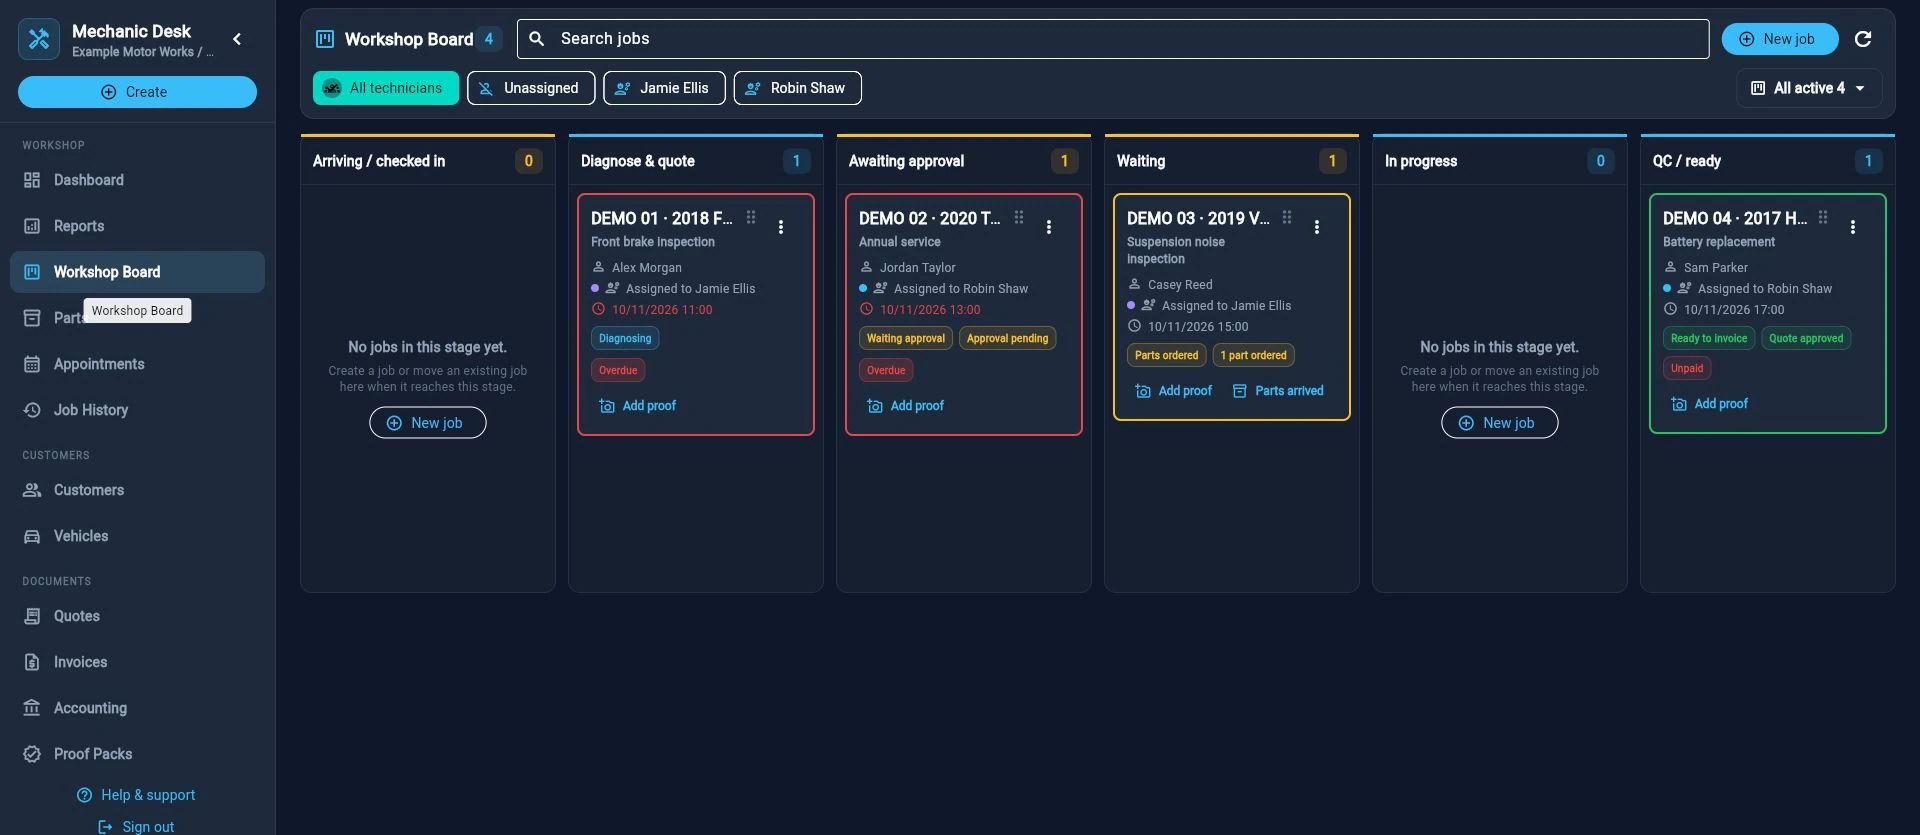
The board groups active jobs by operational stage. Cards also surface customer, vehicle, technician, timing and attention signals.
- Arriving / checked in
- The booking has become live workshop work or the vehicle has arrived.
- Diagnose & quote
- Findings and the recommended work are being established.
- Awaiting approval
- The next action belongs with customer approval.
- Waiting for parts
- The job is constrained by required parts or supply timing.
- In progress
- Approved work is actively being carried out.
- QC / ready
- The work is complete enough for quality control, invoice or handover.
Filters and quick actions
Filter all active work by technician or unassigned status, and use attention views for today, approvals, parts, ready-to-invoice, MOT advisories or delayed parts. Open the card for the full record; use quick actions only when the visible context is sufficient.
Use the job as the shared source of truth
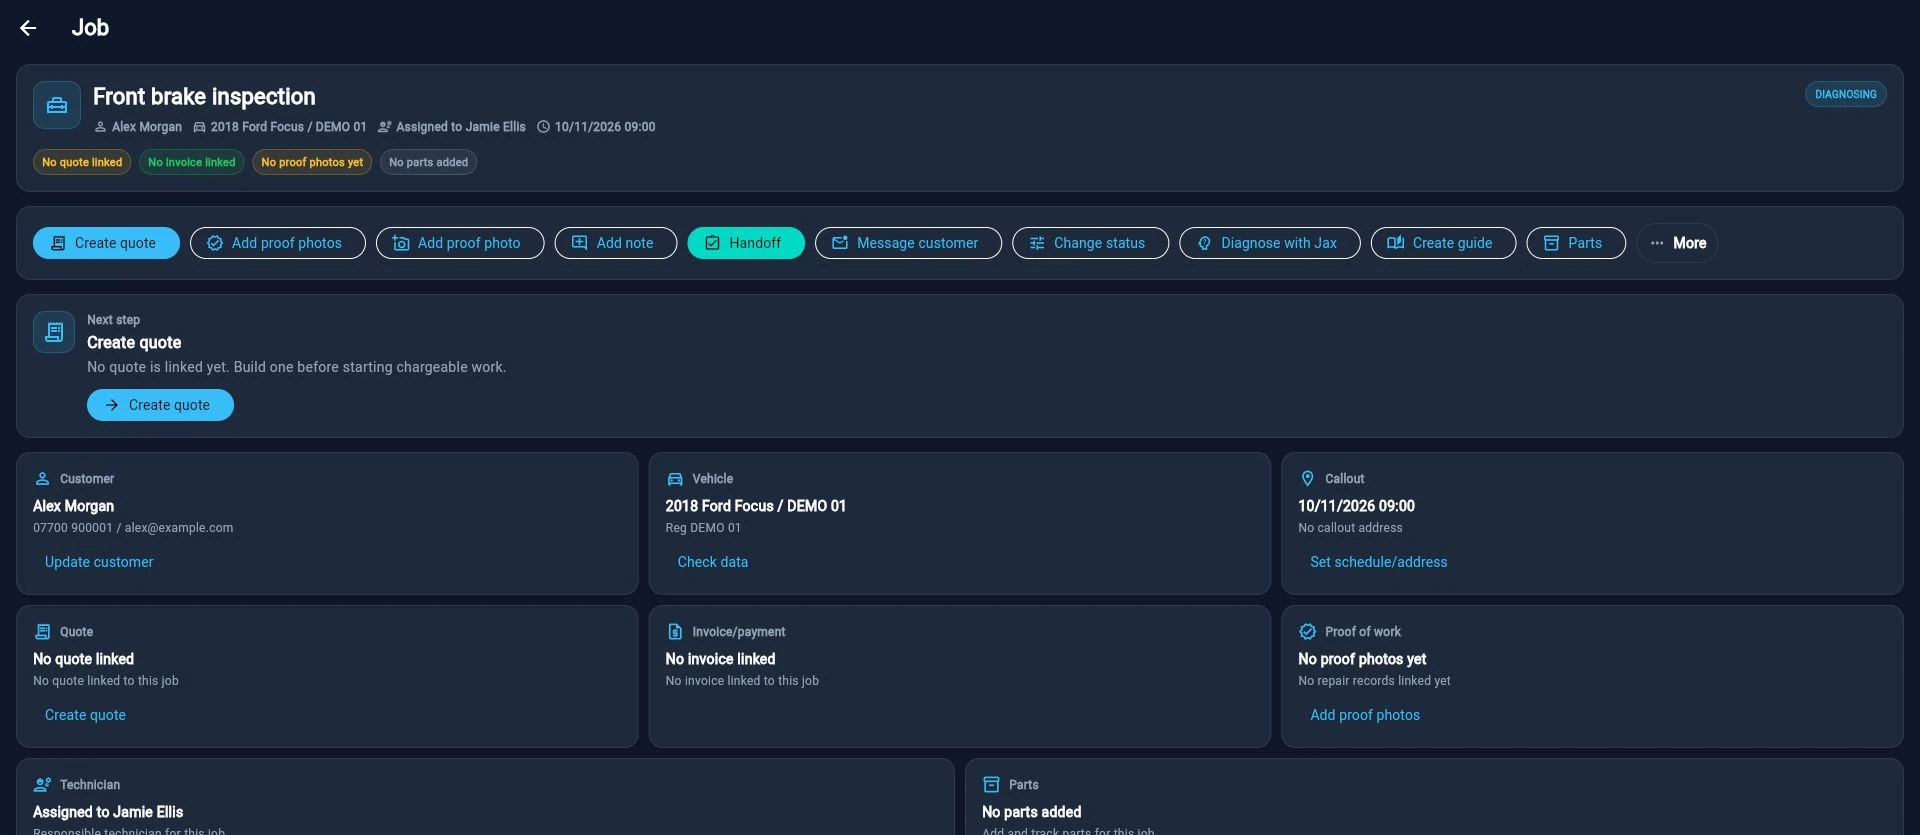
A job connects the customer complaint to the people, vehicle, findings, commercial documents, evidence and final outcome.
What to maintain on the job
- Complaint and work details: preserve what the customer reported separately from confirmed findings.
- Status and timing: show the real stage and expected schedule.
- Technician: assign clear ownership; reassign when responsibility changes.
- Internal notes: keep operational detail internal and pin the most important note when supported.
- Checklist: break the work into reviewable items and update completion deliberately.
- Parts: record requirements and current supply/fitting status.
- Proof: add relevant, labelled evidence rather than an unstructured photo dump.
- Documents: link quotes, invoices and proof packs instead of creating unrelated records.
- Activity timeline: use it to understand what changed and when.
Internal versus customer-facing information
Internal notes, margins, private supplier detail and internal-only events must remain outside customer documents and messages. Preview every PDF and edit every generated draft before external use.
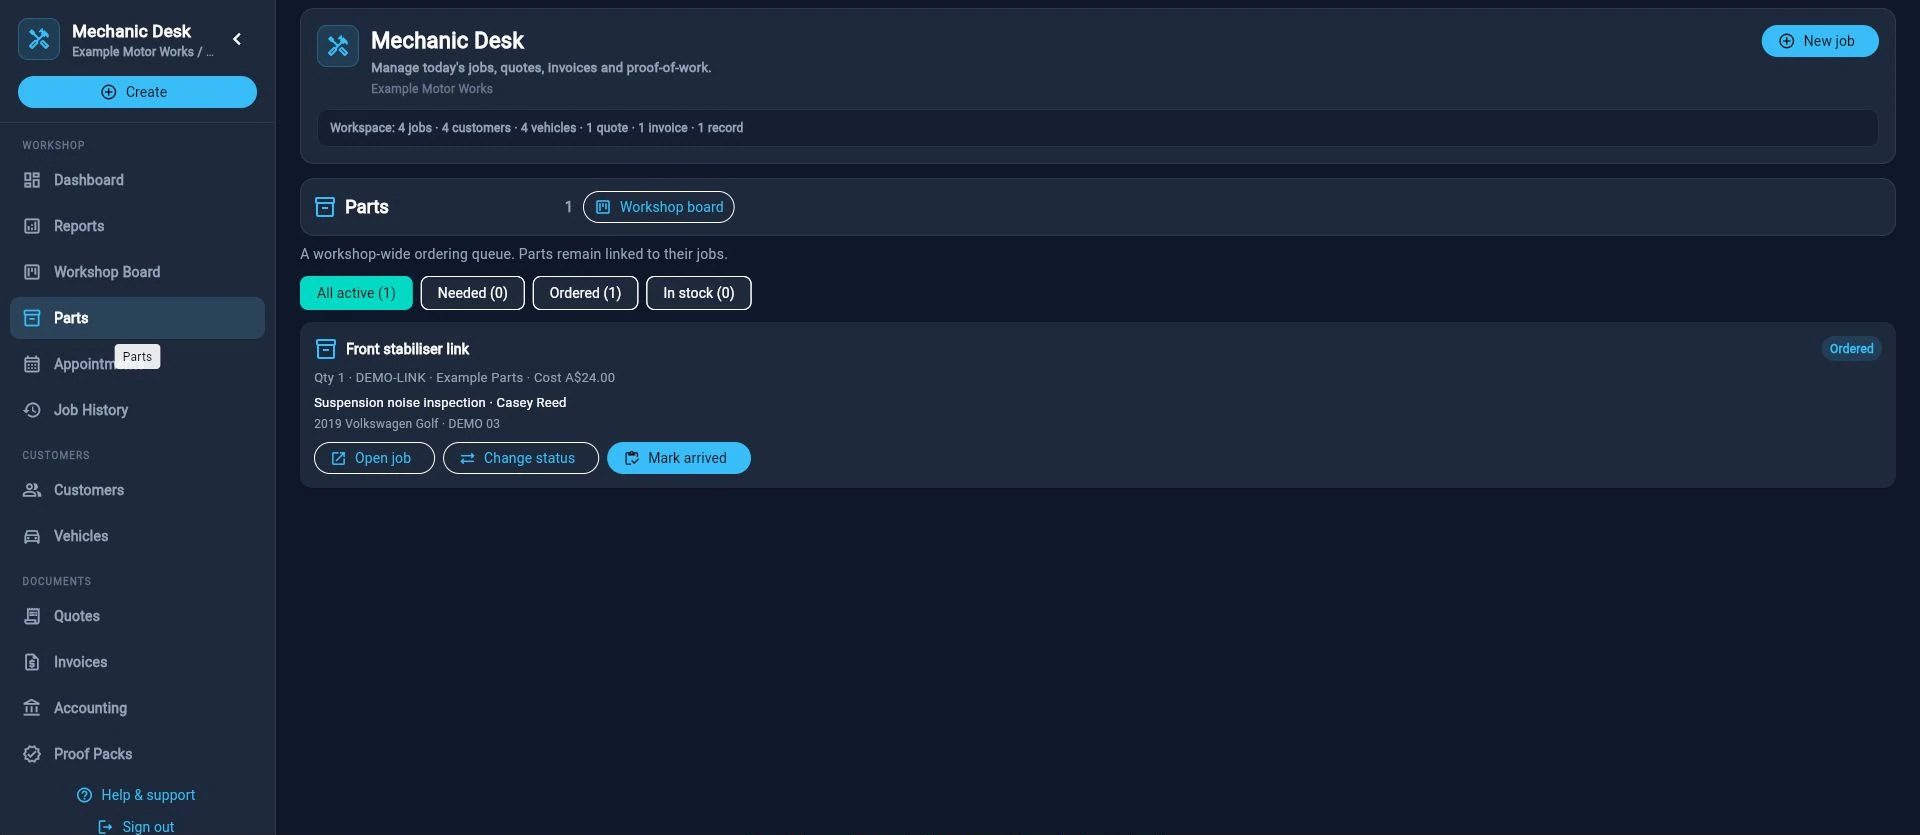
Follow parts from requirement to fitting
Open Parts to see requirements across jobs, or maintain parts on the individual job. These are your workshop’s records, not an automatic supplier order.
- Open the relevant job and add a part with a clear name, quantity, part number and supplier where known.
- Record cost and customer price separately. Keep private supplier notes and margin information out of customer-facing fields.
- Move the part through the statuses shown by the app—such as needed, ordered, arrived or fitted—only as those events happen.
- Record the expected arrival and any receipt or warranty reference. Use the Parts workspace filters to find delayed supply and work that can restart.
- Review the job and commercial document separately after a part changes; a stock/status edit does not prove an order was placed or an invoice was sent.
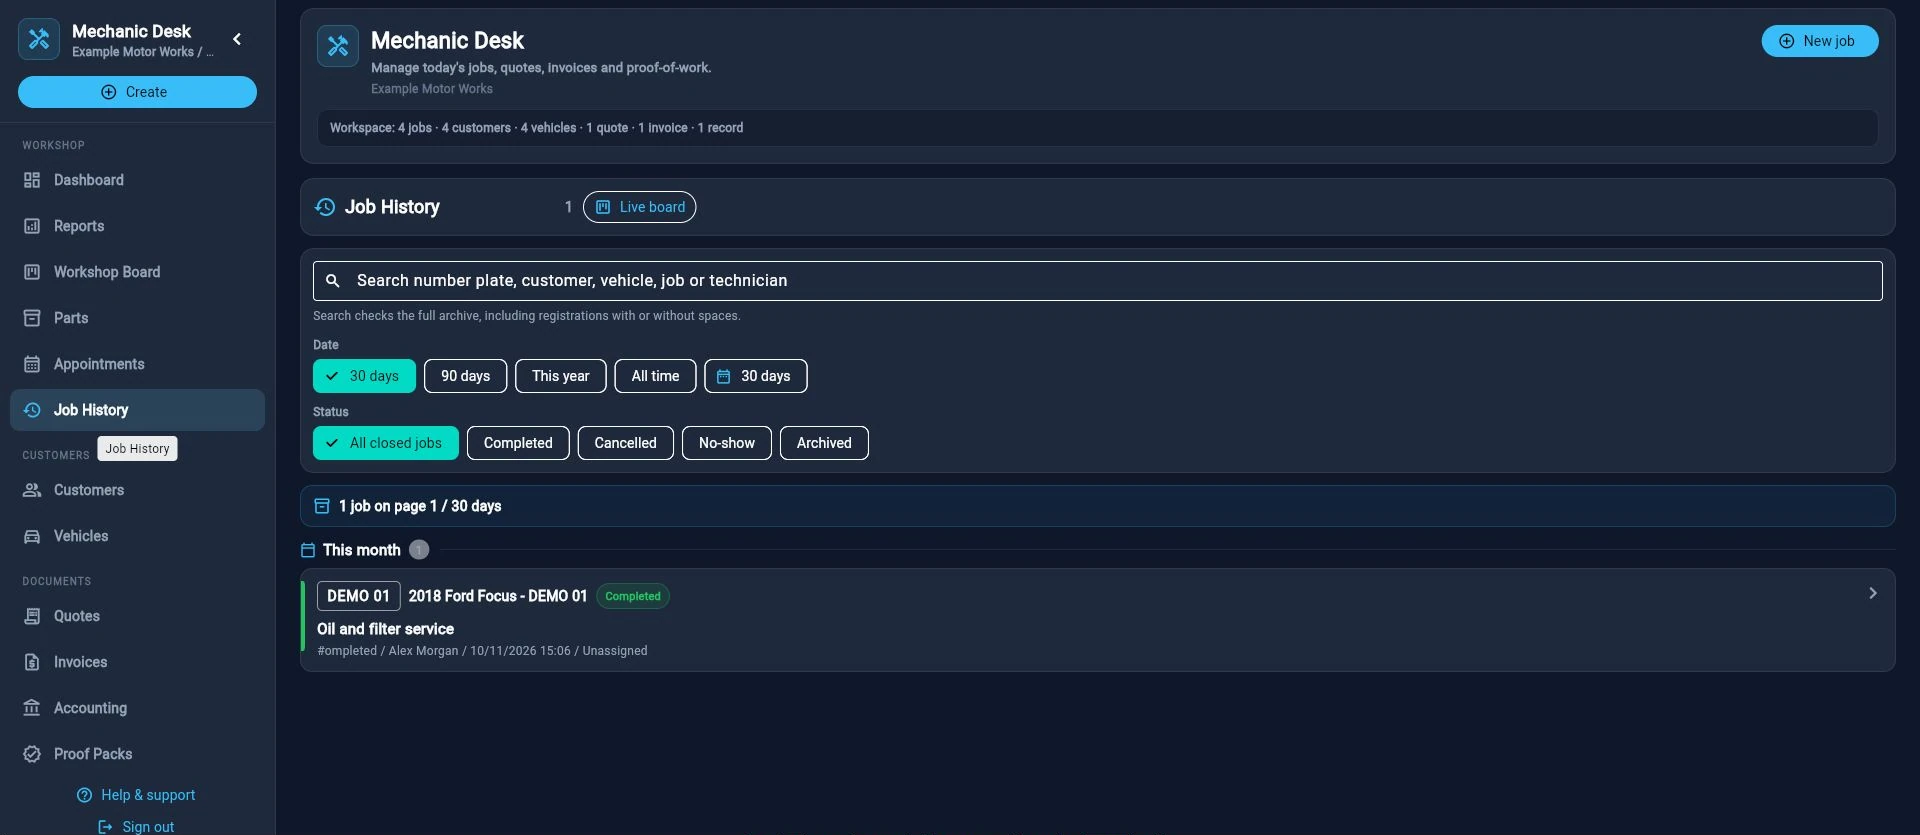
Find completed work and keep the audit trail
Completed, cancelled, no-show and archived jobs belong in Job History, away from active work on the board.
- Select Job History and choose the date range or status filter.
- Search for a customer, vehicle or job description and open the matching record.
- Review findings, documents, payment state and evidence before answering a customer or starting repeat work.
- Use a follow-up or repeat-job action where offered. Reopen a job only when work genuinely needs to resume, and retain the original history.
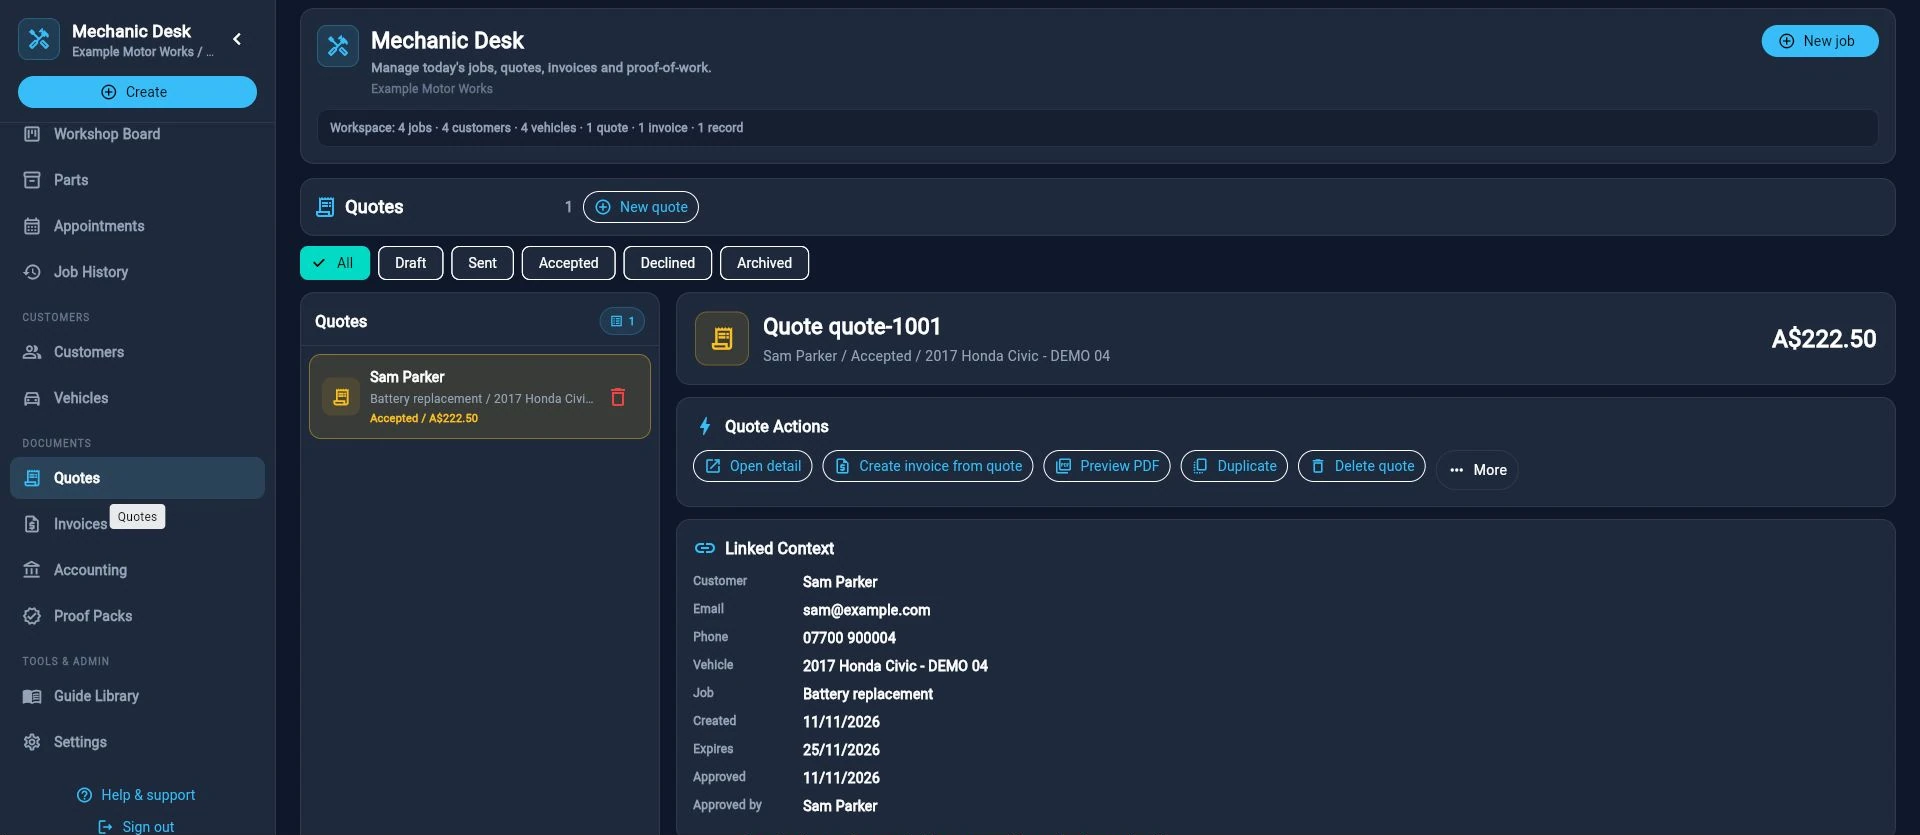
Create a clear approval trail
A quote can start from a job or independently. Linking it to the job is preferred because the customer, vehicle and approval remain connected to the work.
- Choose Create quote from the job, or Quotes → New quote.
- Select or confirm the customer, job and vehicle context.
- Add labour, part and fee lines with clear descriptions, quantities and unit values.
- Apply discount and VAT/tax only as intended; verify subtotal, tax and total.
- Add expiry, notes and customer-facing terms.
- Save the draft. A local draft indicator means the current browser may hold work that has not yet reached the shared cloud record.
- Preview the PDF and correct branding, contact details, line wrapping or page breaks.
- Complete the real customer handoff, then update the quote status to Sent.
- Record Accepted or Declined only after the customer response is known.
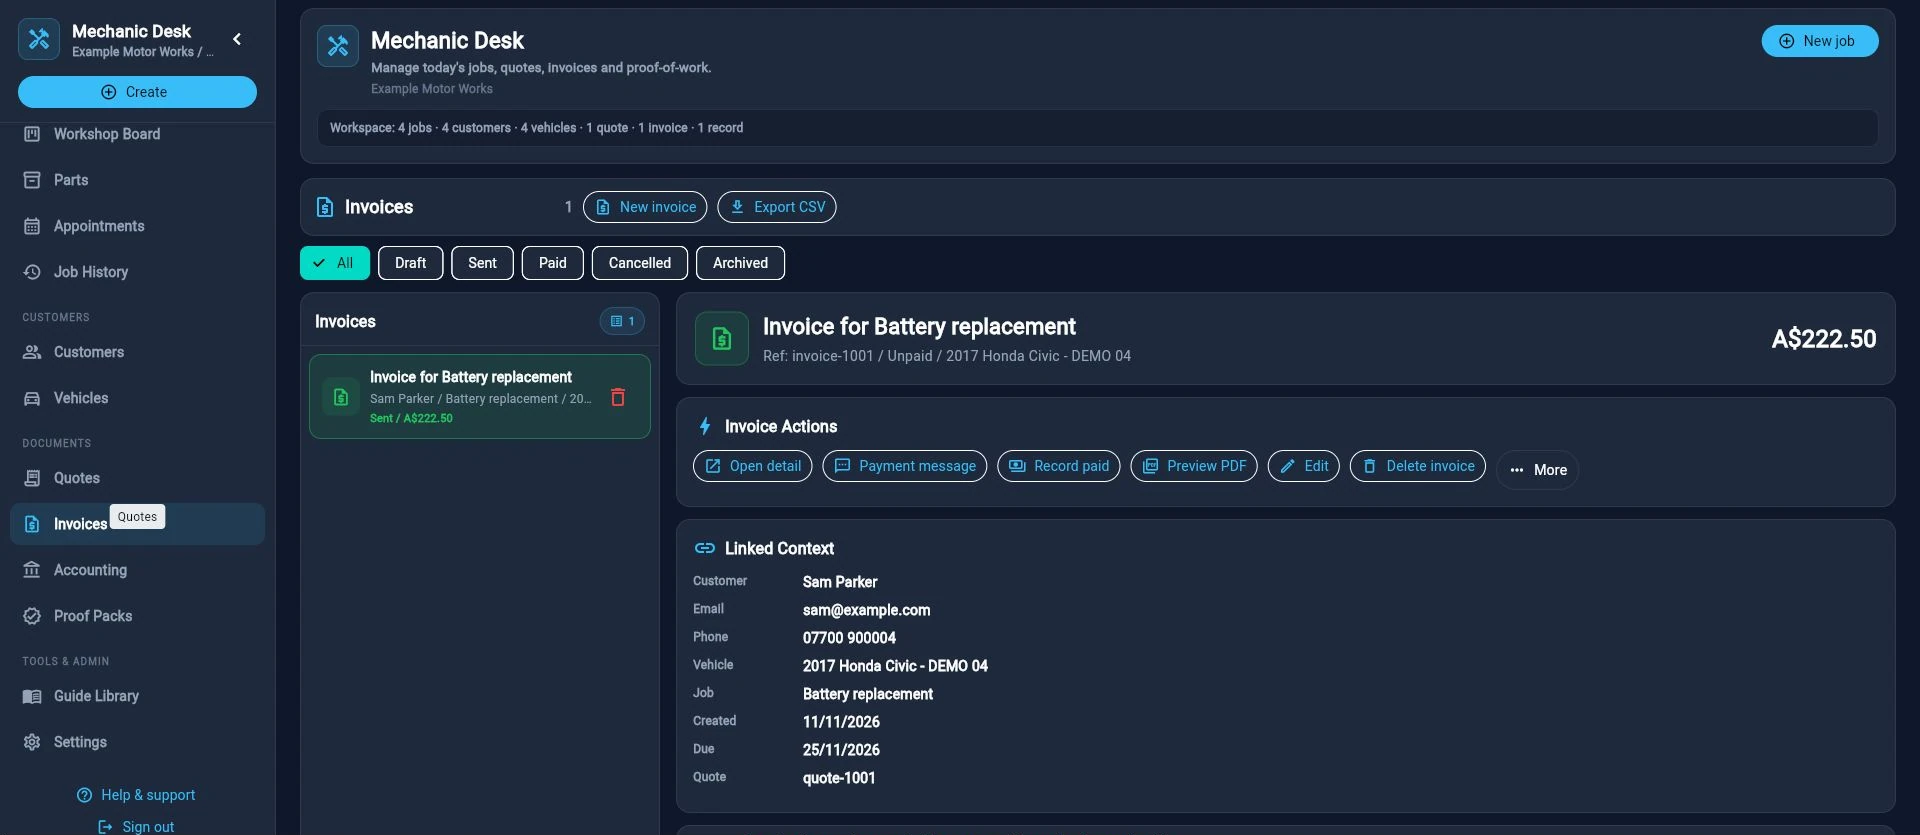
Invoice accurately and record what actually happened
Create the invoice from an accepted quote where possible, or start one manually when the work has no quote.
- Open the accepted quote and select Create invoice, or use Invoices → New invoice.
- Review every line, total, customer detail, date and due date before saving.
- Preview/download the PDF and complete the chosen customer handoff.
- Update the status to Sent only when it has been handed off.
- Use Payment message to prepare an editable request; copy or open the chosen channel and finish the action outside HoodHero where required.
- Use Record paid after payment is confirmed. Save method/provider label, reference, note and date when useful.
- If a payment was recorded incorrectly, mark unpaid or correct the record while preserving an honest trail.
Take an online payment with Stripe
- Open the payment setup offered by the app’s integrations/payment controls and complete extra web verification if asked.
- Connect your workshop’s Stripe account and finish any Stripe requirements. A listed payment provider is not connected until its status confirms readiness.
- Open the invoice and create the customer payment link when the connected provider allows it. Check invoice, amount and currency before sharing.
- Use the payment-message action to hand the link to the intended customer. A customer completes payment on the hosted provider page.
- Confirm provider payment status before recording/reconciling the invoice. Manual bank, cash or card records remain separate from creating a live payment link.
Your HoodHero subscription checkout pays for HoodHero membership. Connecting Stripe for customer invoices enables your workshop to collect its own customer payments; these are separate workflows.
Turn evidence into a professional handover
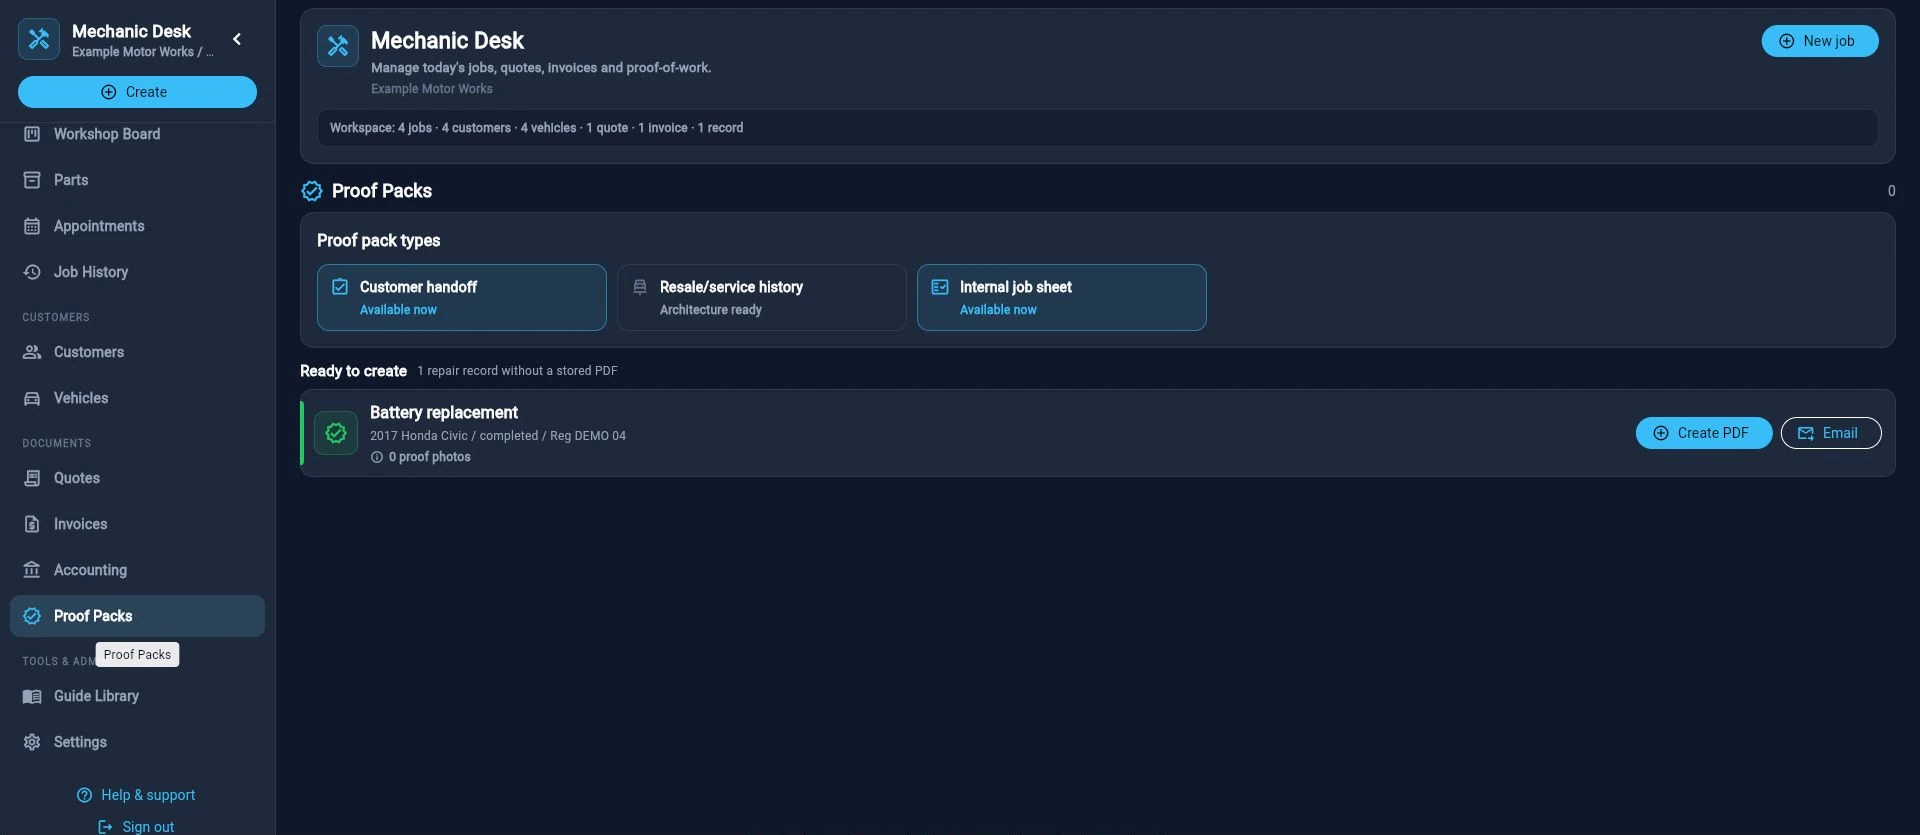
Proof Packs collect selected workshop evidence and context into a PDF. Choose the variant for the audience.
- Customer handover
- A clear external record of the vehicle, job and selected evidence.
- Resale/service history
- Listed as a planned format. If its control is disabled, it is not yet available to generate; use an available handoff or internal format.
- Internal job sheet
- A workshop-focused pack that may include operational detail not intended for customers.
Create and share a proof pack
- Add properly labelled proof photos and completion evidence to the linked job or repair record.
- Open Proof Packs or use the proof action on the job.
- Choose the correct repair record and pack variant.
- Preview the PDF. Verify customer, vehicle, dates, business branding, image selection and any signature.
- Confirm internal notes, margins, secrets and unselected technical data are absent from external variants.
- Download or prepare the email handoff. Confirm the actual customer delivery outside HoodHero where appropriate.
Move clean operational data into business review
The reports explain current workshop state. Accounting export moves selected invoice data into a CSV; it does not replace bookkeeping or tax review.
Connect Xero or QuickBooks Online
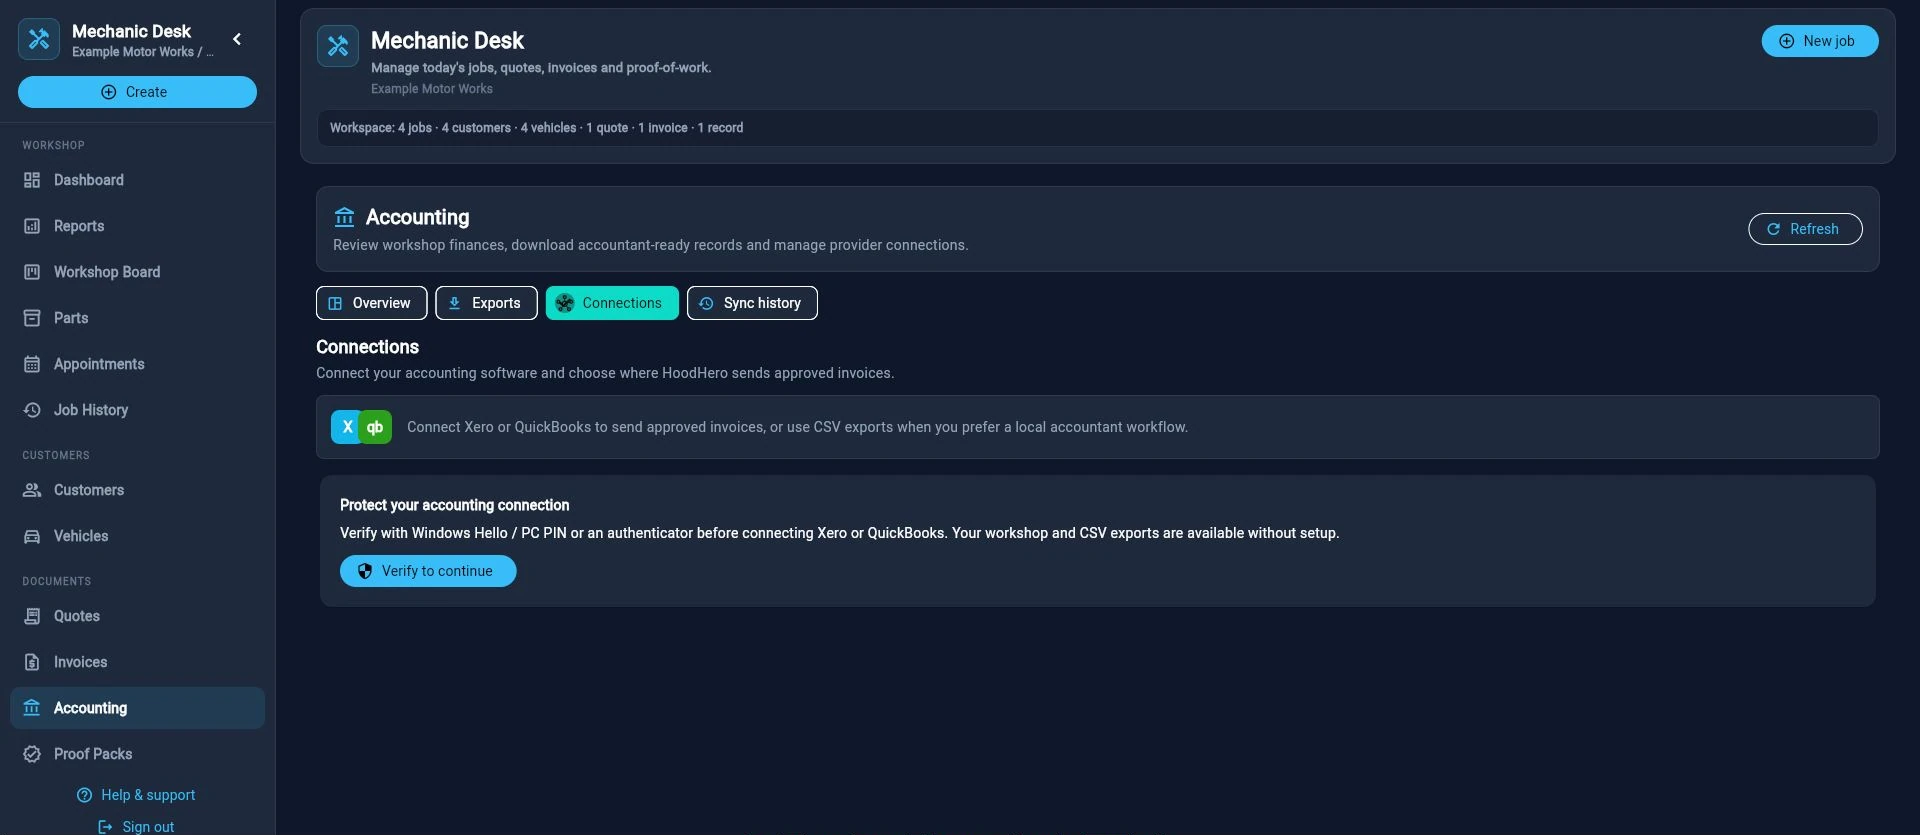
- Open Accounting → Connections and complete device screen-lock or authenticator verification if requested.
- Select Connect for Xero or QuickBooks Online. Sign in to that provider, select the intended company and review its consent screen.
- Complete the provider’s approval. The confirmation page tells you to return to the original HoodHero tab; refresh/check the connection there if it has not yet updated.
- Check the company name, country and home currency. Xero and QuickBooks connections support UK, US, Canadian and Australian companies; the invoice currency must match the company currency.
- Open the mapping/setup controls. Select the income/service item, tax codes and payment/deposit account that are actually available in that company.
- Save the reviewed mappings. With tax disabled in QuickBooks, use the available no-sales-tax setup only for genuine zero-tax invoices; taxable invoices need appropriate provider tax setup first.
Sync invoices and bookkeeping payments
- Open the invoice and review its final customer, lines, tax and stored currency.
- Choose the connected accounting provider’s sync/export action. If mappings, currency or company capabilities do not match, resolve the shown issue before retrying.
- Review the result and Accounting → Sync history. Confirm the resulting record in the accounting provider rather than assuming a click succeeded.
- After a real customer payment is confirmed and recorded in HoodHero, sync its bookkeeping payment where supported. This records the payment in accounting; it does not transfer money.
If the customer changes their QuickBooks plan or tax settings, recheck the available mappings and capabilities. A UK/US/Canada rollout does not mean cross-currency accounting is enabled: HoodHero does not convert invoices or supply foreign-exchange rates.
Use dashboard reports
- Choose the report period and confirm the displayed currency.
- Review active jobs, approvals, parts delays, unassigned work, invoice status and profitability context.
- Select a count or action row to open the supporting records rather than relying on the summary alone.
- Resolve incorrect figures by correcting source jobs, documents or payment status.
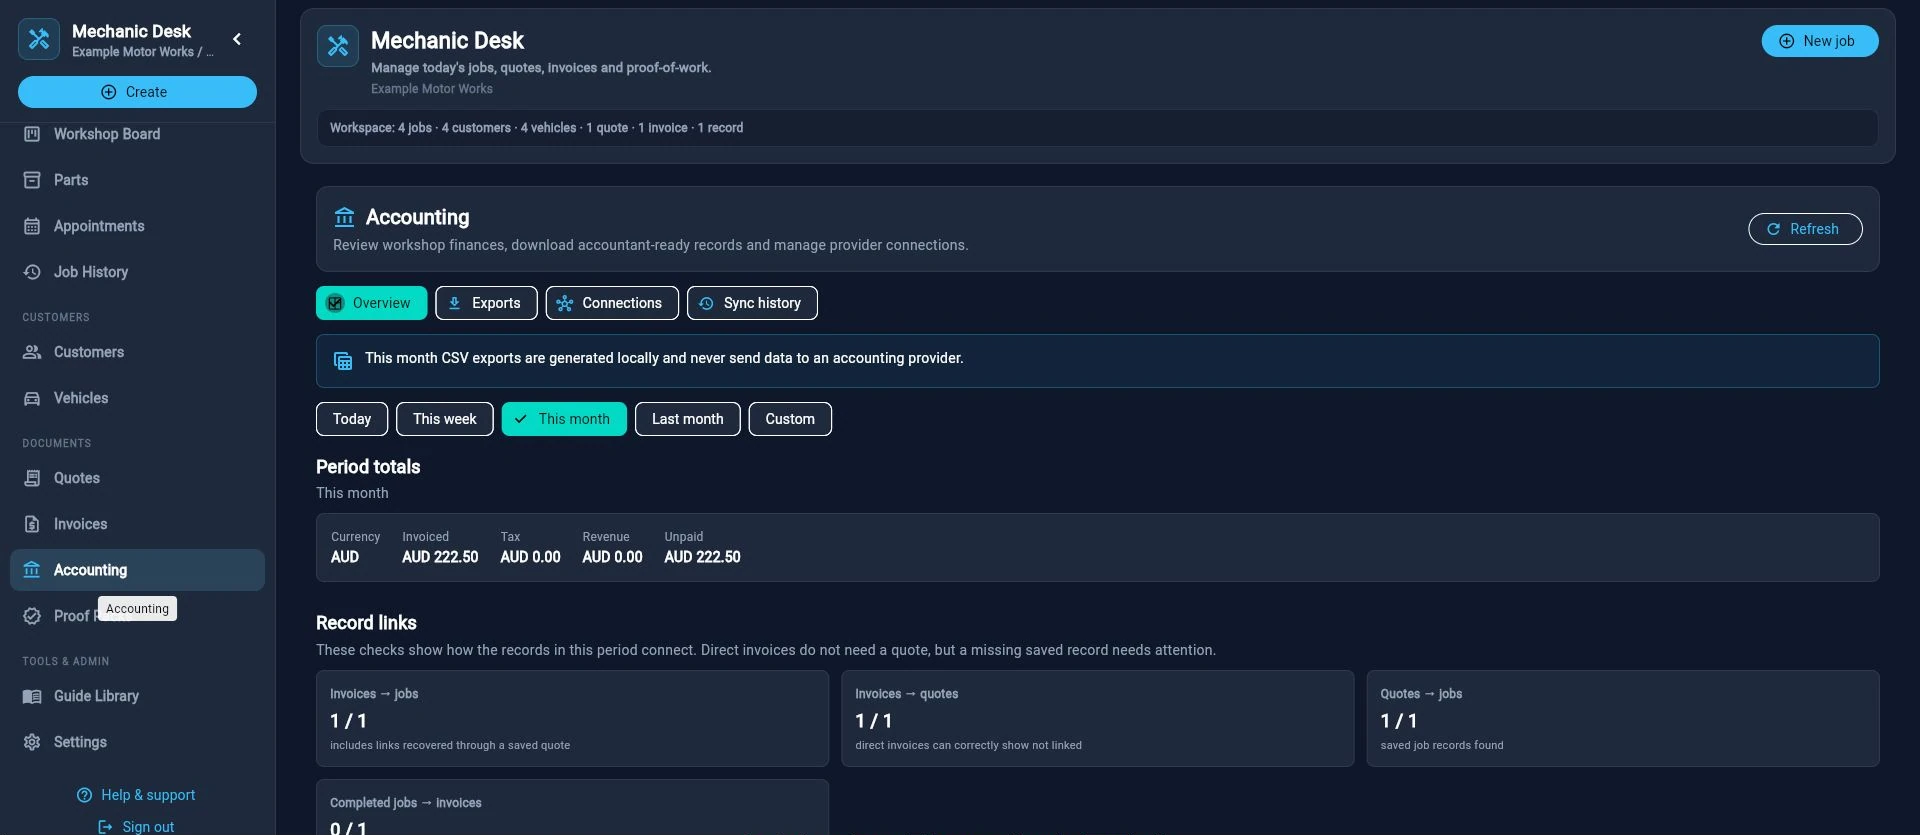
Export accounting CSV
- Open Accounting, or choose Export CSV from Invoices.
- Select the date range and export type/provider format offered by the screen.
- Review the included fields and generate the file.
- Open the CSV in Excel, Google Sheets or the receiving accounting workflow.
- Verify invoice numbers, customer names, dates, totals, tax, currency and payment status before importing or reconciling.
Use Jax as a reviewed workflow assistant
AI output should accelerate a qualified human decision, not silently become a factual workshop record.
Search or generate repair guidance
- Open Guide Library.
- Search by vehicle, engine, complaint, repair or known terminology.
- Open a suitable saved guide, or start generation with the exact vehicle and job context.
- Review tools, steps, safety warnings and any uncertain values.
- Edit or reject incorrect content. Verify exact torque, part, fluid and procedural data independently.
- Save once, then link useful checklist or guidance context to the job where supported.
Start or resume a conversation with Jax
- Choose Diagnose a fault for an unknown problem, or Create repair guide when you already know the work required.
- Select a saved garage vehicle or enter its make, model, year and engine. Review any regional lookup result before continuing.
- Enter the complaint or requested repair and choose Start with JAX. Describe what you observed, tests already completed and any relevant warning lights or codes.
- Answer follow-up questions in the message box. Where offered, use Attach up to 3 photos for clear, relevant evidence; keep customer personal information out of the images.
- Use Recent sessions or Resume with JAX to continue an existing investigation instead of starting again.
Use and improve a saved guide
Open the guide to review steps, tools, warnings and private garage notes. Use Print PDF or Share / download PDF for a reviewed copy. Add checklist to job links useful steps to the work; Prepare quote seed provides editable quote content for you to price and approve.
Use Confirm used successfully only after the workshop has genuinely used the guide. Add community note and Suggest improvement let you contribute reviewed observations. A community confirmation does not replace approved technical data.
Workflow AI assistance
AI actions can draft job notes, summaries, quote/invoice descriptions and customer messages using the context already present. Review for accuracy, tone, privacy and promises. Never allow a generated draft to claim an inspection, completed repair, delivered message, exact part or successful provider action that the workshop has not verified.
Private guides and the community library
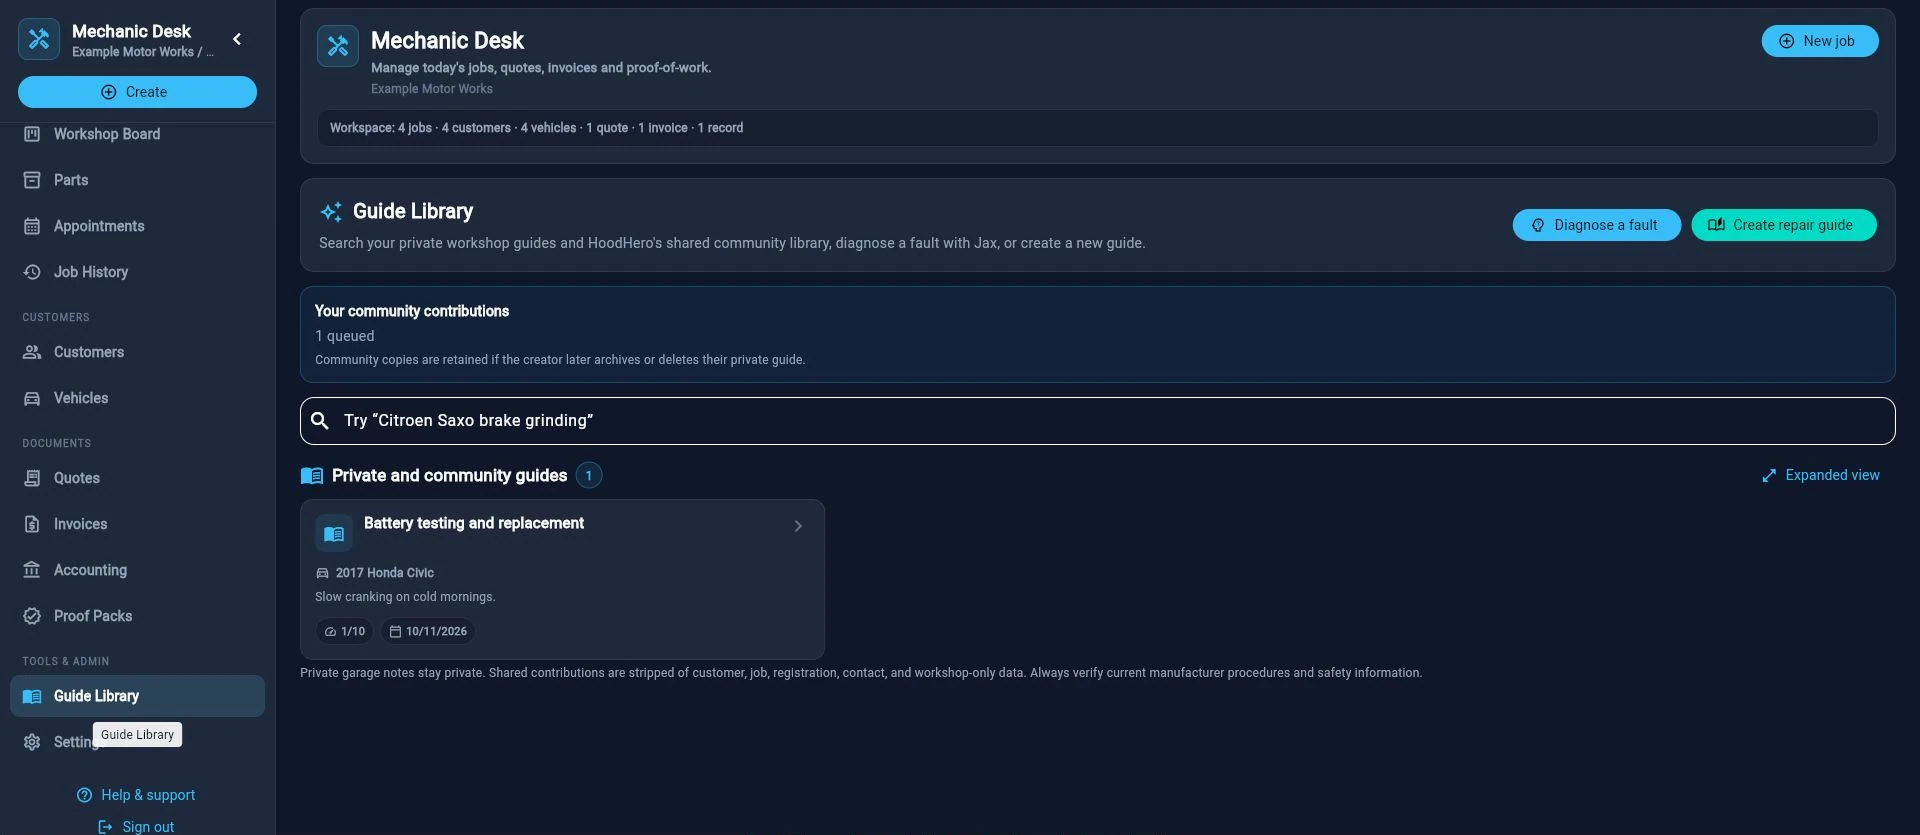
The library searches your private workshop guides and shared community guidance. Use Diagnose a fault for an investigation with Jax, Create repair guide for known work, and Expanded view for more reading space. Review a guide before applying its checklist or saving it to a job.
Private garage notes remain private. Community contributions are stripped of customer, job, registration, contact and workshop-only data. A retained community copy may remain after its creator archives or deletes the private guide; archiving your private copy does not promise removal from the shared library.
Maintain the workspace without losing the record
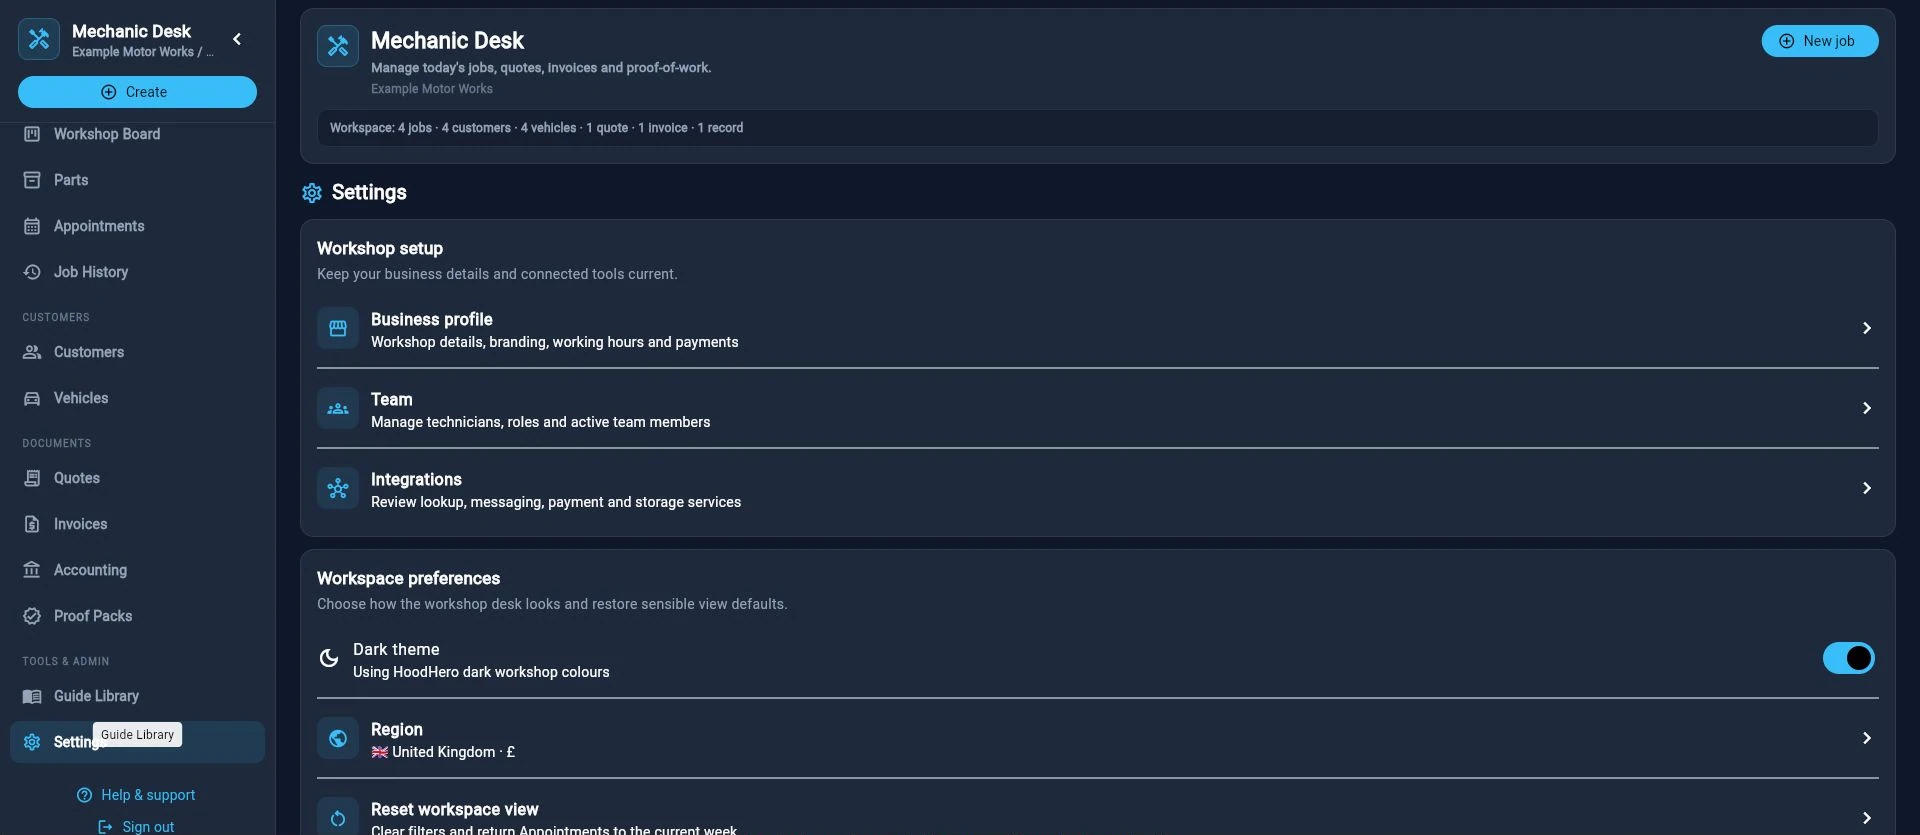
Settings contains business, team and provider configuration alongside browser-local and workspace data controls.
- Business profile
- Customer-facing identity, contact details, logo, document and payment defaults, hours and related settings.
- Team
- Create, edit, activate, deactivate and remove team members; use active members for job assignment.
- Workshop tools
- Review real provider availability, configuration and connection state.
- Local drafts
- Inspect or clear browser-held quote/invoice drafts only after confirming they are no longer needed.
- Reset view
- Returns workspace filters or presentation state to defaults without implying business records were deleted.
- Delete data
- Destructive workspace controls. Read the target and confirmation carefully before continuing.
Plan follow-up and record customer communication
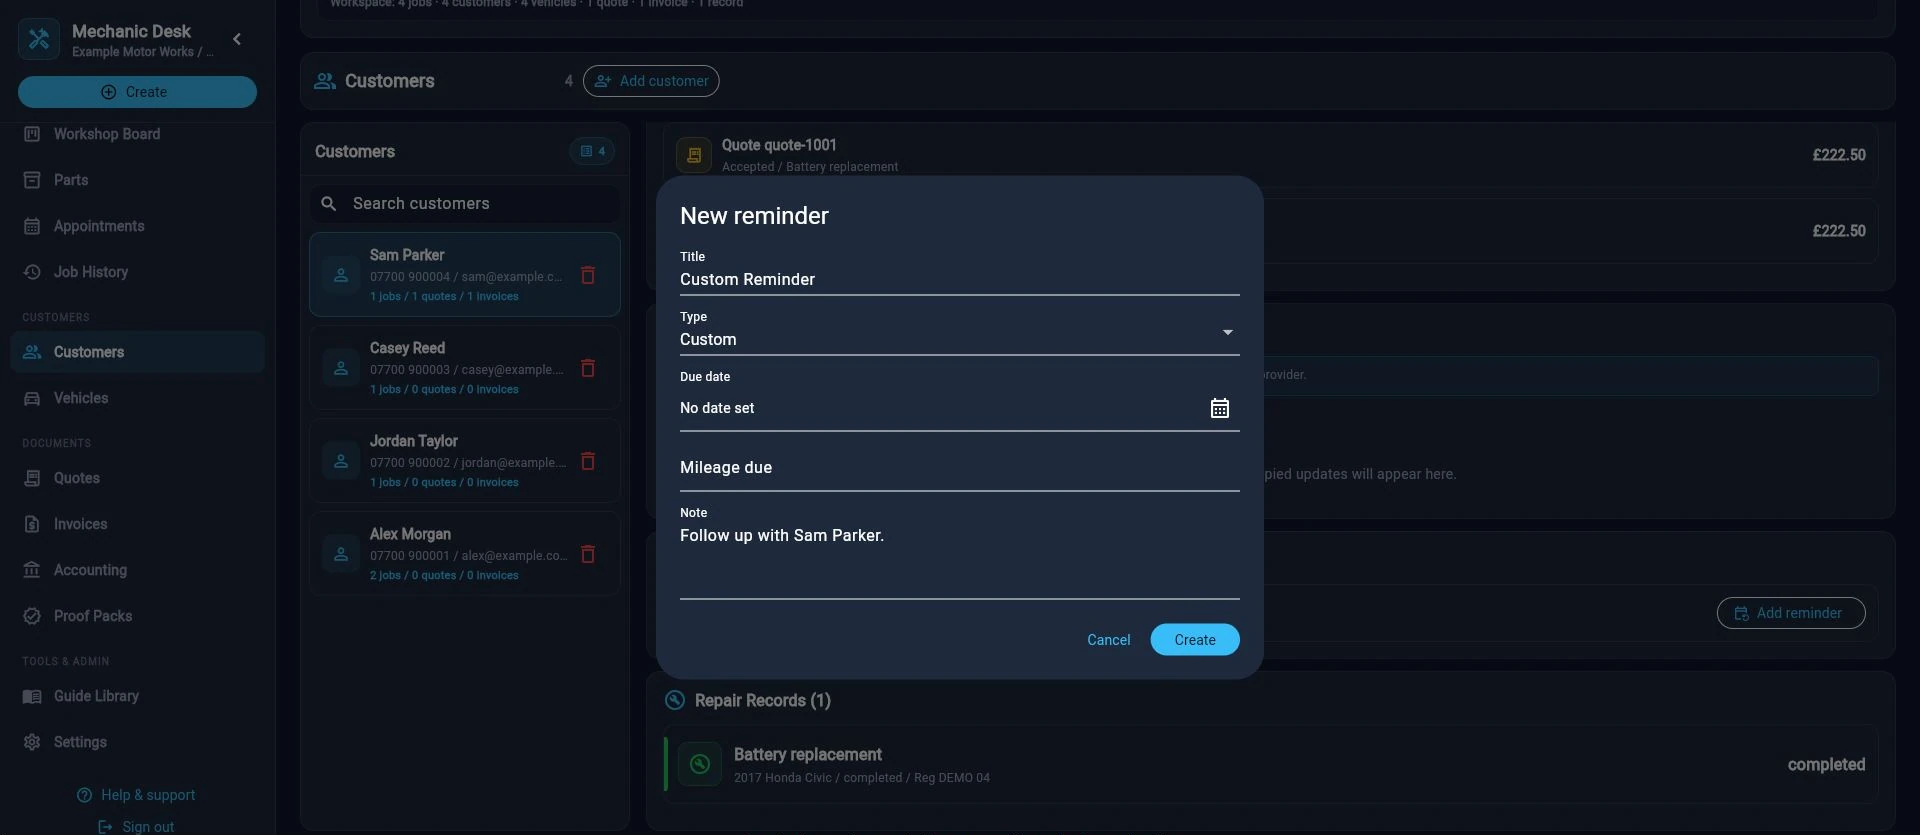
Use the customer, vehicle or job record to keep follow-up attached to the work. The Dashboard highlights reminders due.
- Open the relevant customer, vehicle or job and choose the reminder action.
- Choose a suitable reminder type, due date and useful note. UK MOT reminders are UK-specific; use service, inspection or a custom reminder elsewhere.
- Review due reminders from the Dashboard and complete or cancel each only when appropriate.
- For a customer update, choose a message template, review the destination and edit the draft. Then copy it or open the external channel offered.
- If using Open email app or a copied message, finish sending in your chosen app. If using HoodHero’s available Send email action, check the result and communication history for provider acceptance. Neither a copied draft nor provider acceptance proves the customer has read it.
Carry the same job into the field
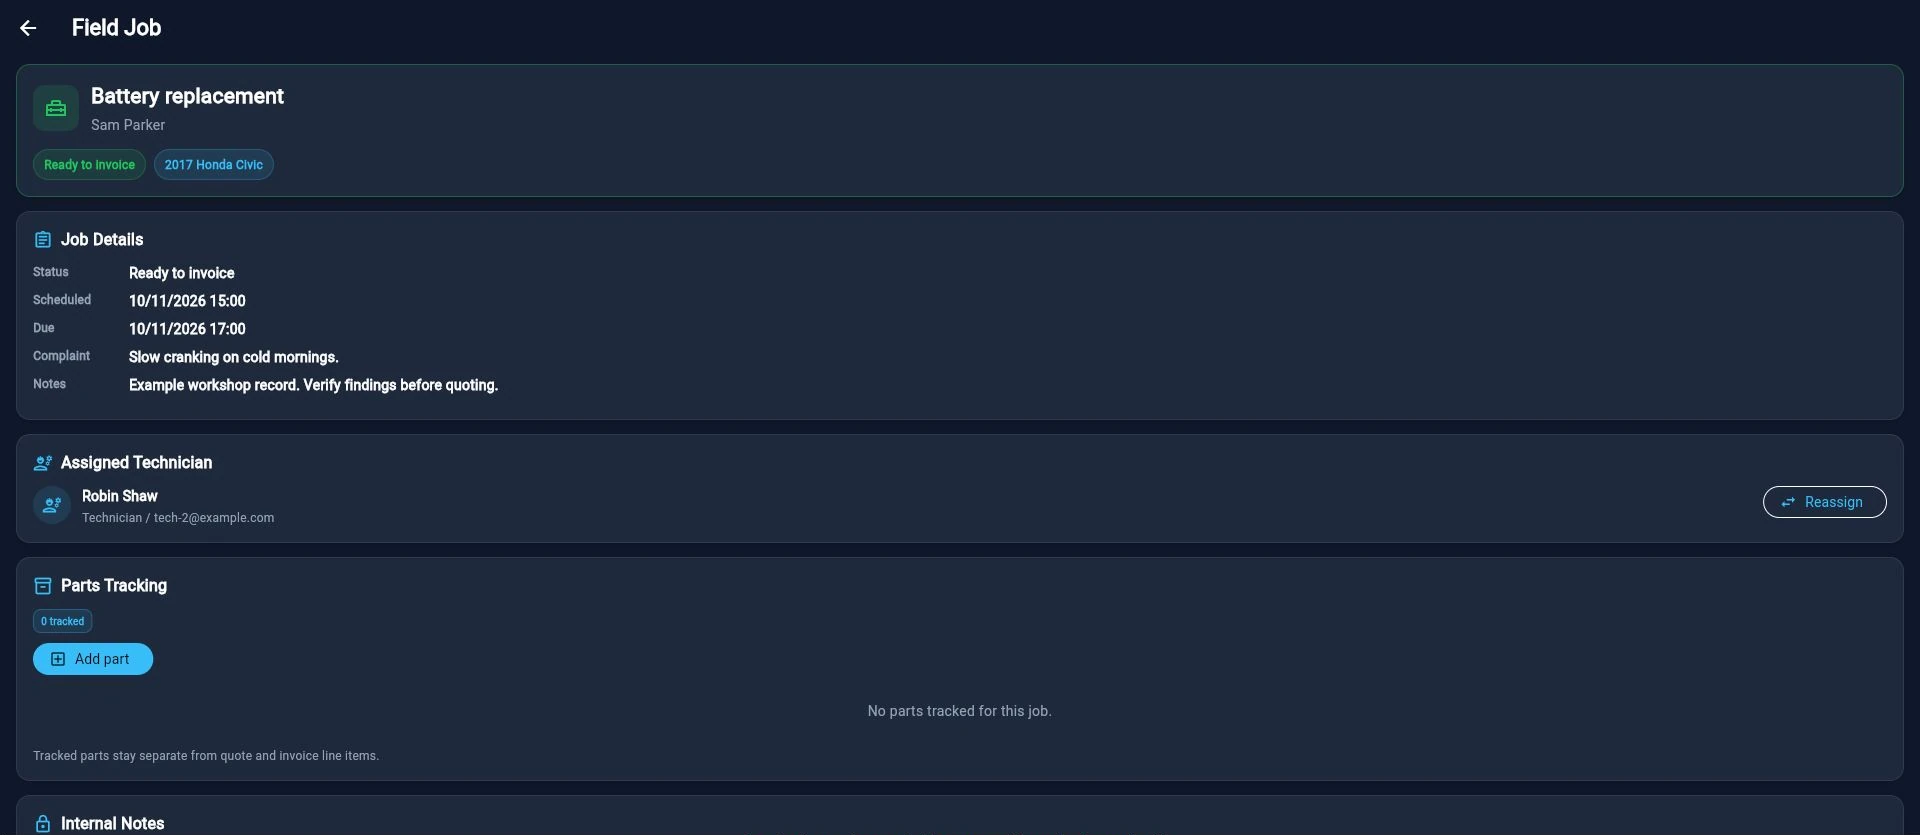
The browser is strongest for desk control. The HoodHero mobile app adds field-oriented actions while preserving the same customer, vehicle and job context.
- Open the active field job with customer, vehicle, callout, appointment and document context.
- Use the mobile diary for today, tomorrow, this week and later.
- Capture before, fault, during, odometer, registration, parts/receipt, after, completion and handover proof categories.
- Capture a customer handover signature where appropriate and consented.
- Queue proof uploads when the connection is poor, then confirm they finish after connectivity returns.
- Prepare customer messages and payment requests, while preserving the difference between drafted, opened and actually delivered.
- Use the mobile app for supported Bluetooth/OBD scanning and device capture. Check device capabilities and permissions before starting.
Common problems and safe recovery
- Cannot sign in
- Allow the sign-in pop-up, retry the same provider, check browser privacy settings and confirm you are using the HoodHero account connected to your web membership.
- Sign-in opened another tab
- Complete Google/Apple sign-in there and return to the original HoodHero tab. Avoid opening multiple sign-in attempts.
- Device verification is unavailable
- Windows Hello, Mac passkeys or the current browser may be unsupported or not configured. Use the authenticator alternative for protected actions. Normal workshop access does not require either setup.
- Security page after verification
- If it says Verification complete, choose Back to workshop. You do not need to verify repeatedly. A protected action will ask again when its session expires.
- Authenticator code rejected
- Use the HoodHero account’s current six-digit code, wait for a fresh code and check your authenticator device’s clock. Never send the code or setup key to support.
- Membership not detected
- Confirm the same HoodHero account was used for checkout, then choose Check membership.
- Data looks stale
- Use the page refresh action or pull-to-refresh where present. Avoid repeated saves while the network is unstable.
- Vehicle lookup failed
- Check registration/VIN formatting and provider configuration. Preserve existing good data; failed lookup should not be treated as a blank result.
- PDF did not download
- Allow downloads/pop-ups for the app, retry preview, and check the browser downloads panel.
- Message status is unclear
- Open communication history. A copied or opened draft does not verify delivery; confirm through the real channel.
- Local draft warning
- Open the draft in the same browser, finish or deliberately discard it. Do not clear local drafts until required content is saved elsewhere.
- Totals look wrong
- Review line quantities, unit prices, discounts, VAT/tax, currency and document status before editing any report summary.
- Accounting connection or sync failed
- Check company, currency, permissions and mappings. Keep the HH support reference shown with an accounting error, then contact support. Do not repeatedly create new invoices to work around a sync error.
Get support
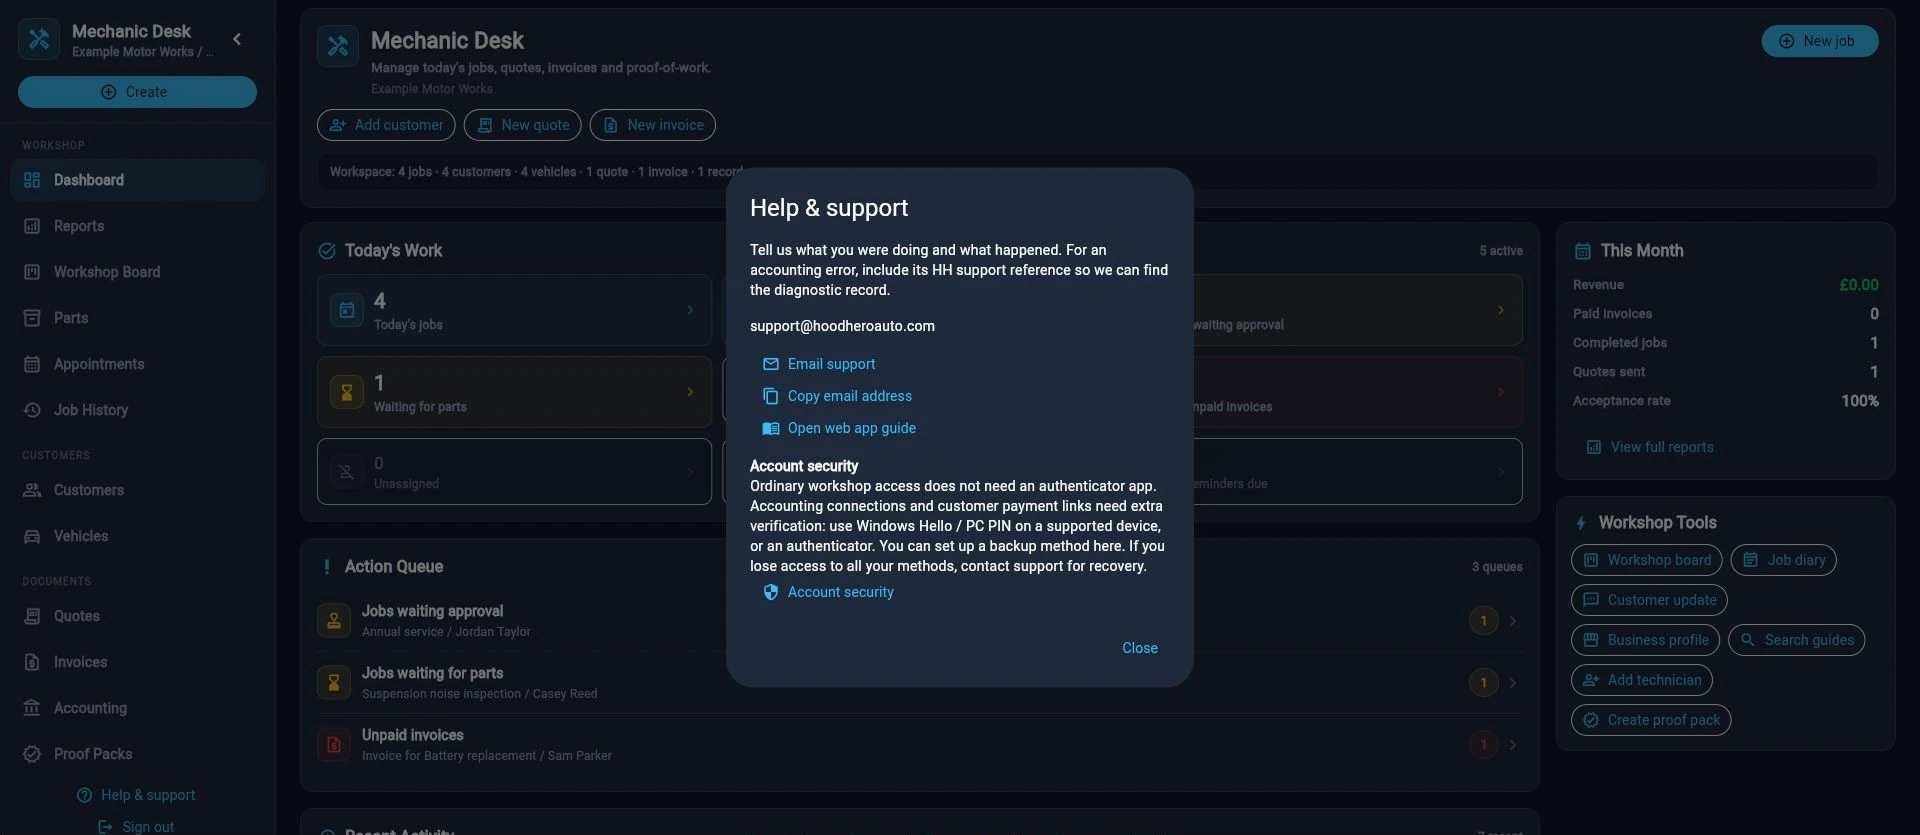
Choose Help & support in the app, then Email support to open your email app, Copy email address to use your own mail client, or Open web app guide. Send to support@hoodheroauto.com with the workspace area, approximate time, browser/device, what you expected, what happened and any HH accounting support reference. Redact customer personal information from screenshots. Never send passwords, PINs, authenticator keys/codes, OAuth codes, API keys or payment-card data.
Privacy and customer data
- Collect only the customer and vehicle information needed for the workshop relationship.
- Use internal notes for internal operations, and verify they remain out of external messages and PDFs.
- Obtain appropriate consent for proof photos, signatures and customer communication.
- Sign out on shared devices and keep the browser/operating system updated.
- Use workspace deletion tools cautiously and follow the workshop’s legal record-retention obligations.